Last updated on
Discover the simple steps to mortise a pocket door handle. Enhance your home’s functionality and style with this easy-to-follow guide.
Pocket doors are a great addition to any home. They save space, add privacy, and can be used as a design element.
However, when it comes to installing a handle on your pocket door, things can get tricky. Unlike regular doors, pocket doors require a particular type of handle mortised into the door itself.
If you’re not familiar with the process of mortising, don’t worry! This article guides you through step-by-step instructions on mortising a pocket door handle like a pro. So grab your tools, and let’s get started!
Key takeaways:
- Measure and mark the height of the pocket door handle.
- Use a chisel or router to cut the mortise in the door.
- Chisel small sections of wood at a time for an even mortise.
- Drill pilot holes for the handle and secure it with screws.
- Test the functionality of the handle and adjust as needed.
Table of Contents
Introduction to Pocket Door Handles
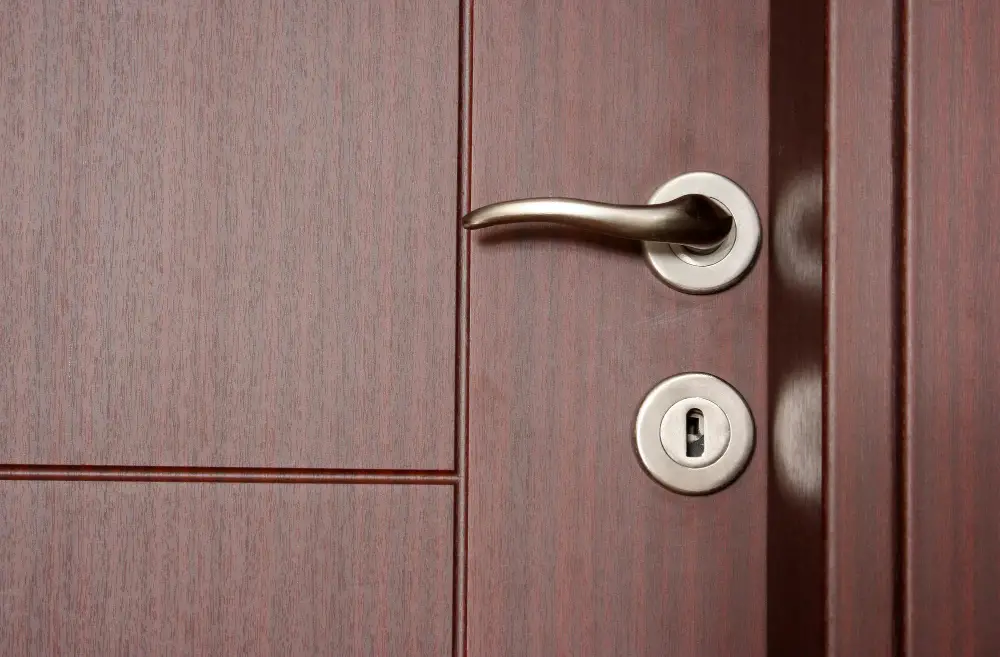
Pocket doors are a popular choice for homeowners who want to save space and add privacy to their living spaces. Unlike traditional hinged doors, pocket doors slide into the wall when opened, making them an ideal solution for small rooms or areas with limited floor space.
However, installing a handle on a pocket door can be challenging since it requires mortising the handle directly into the door itself.
A mortise is a rectangular hole cut into the edge of your pocket door so that your handle can sit flush with its surface. This process requires precision and patience but, once completed correctly, will give you an elegant finish that complements any room decor.
In this article, we’ll guide you through everything you need to know about how to mortise a pocket door handle like an expert.
Tools and Materials Required
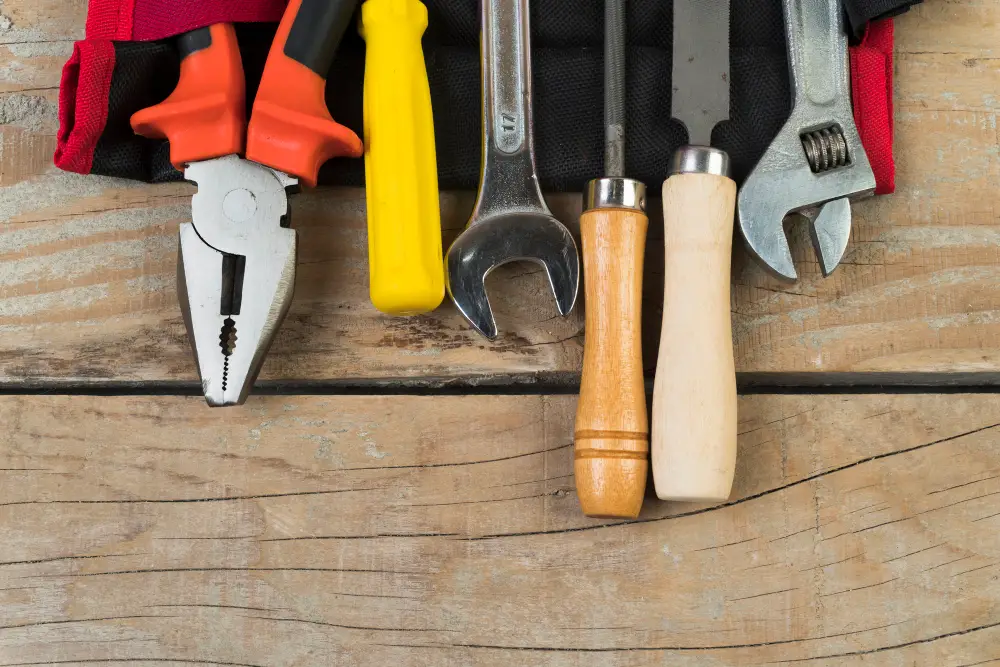
Here’s what you’ll need:
- Pocket Door Handle – Make sure to choose one specifically designed for pocket doors.
- Measuring Tape – To measure and mark where the handle will be installed on your door.
- Pencil or Marker – To make accurate markings on your door.
- Chisel Set – For cutting out the mortise in your door.
- Drill with Spade Bit or Hole Saw Attachment- For drilling holes in your door for latch mechanism installation
- Ruler or Straight Edge-For marking straight lines while measuring.
Measuring and Marking the Door
This step ensures that your handle is centered and aligned with the latch mechanism. To begin, use a measuring tape to determine the height at which you want your handle to be placed on both sides of the door.
Once you have determined this measurement, transfer it onto each side of the door using a pencil or marker.
Next, use a square tool to draw two perpendicular lines across each marking point on both sides of your pocket door. These lines will guide cutting out an even mortise for your new handle.
These markings must be precise because any errors can result in an uneven or misaligned installation later on down the line.
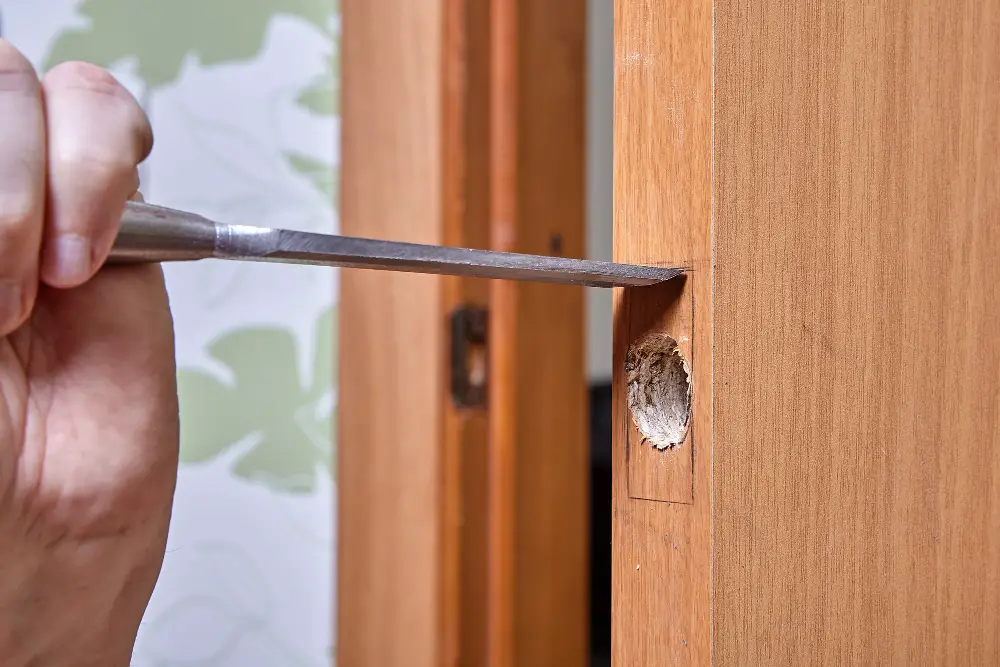
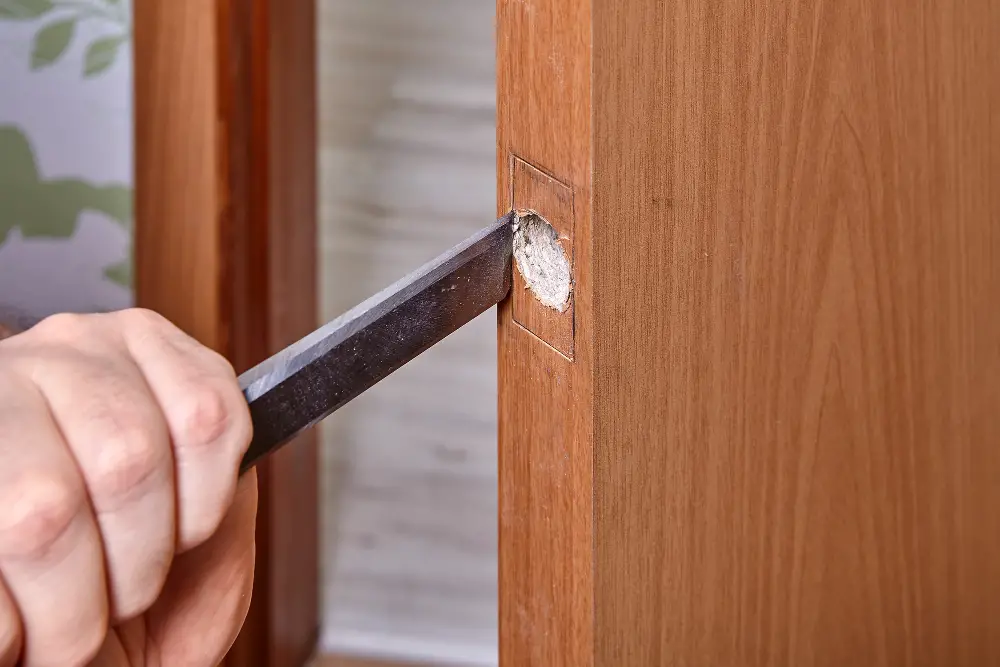
Cutting the Mortise
This is where things can get tricky, but with some patience and precision, you can create a clean and accurate mortise for your handle.
To cut the mortise, use a sharp chisel or router to remove wood from the marked area. Start by making shallow cuts along each outline side until you reach your desired depth.
Be sure not to go too deep, as this could weaken or damage the door.
Next, work on removing any remaining wood between these cuts using either a chisel or router until all excess material has been removed from within your outlined area.
It’s important that you take care when cutting out this section, as any mistakes made here will affect how well your pocket door handle fits into place later on in installation process.
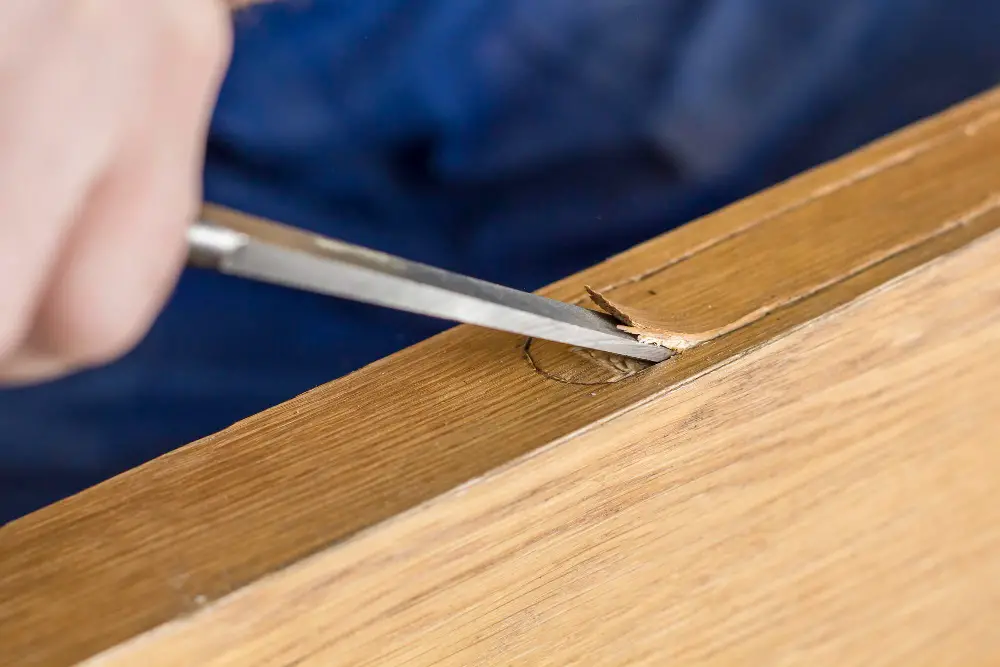
Chiseling the Mortise
This step requires patience and precision, but with practice, you’ll be able to master it in no time.
Start using your chisel to remove small sections of wood at a time. Be sure not to take off too much at once, as this can cause splintering or unevenness in your mortise.
Work slowly and carefully until you reach the desired depth for your handle.
To ensure that your mortise is even on both sides, use a square or ruler as a guide while chiseling. If necessary, you can also use sandpaper or an electric sander to smooth out any rough edges.
Remember that pocket doors are often made from softer woods like pine or cedar, so they may require less force when chiseling than hardwoods like oak or maple.
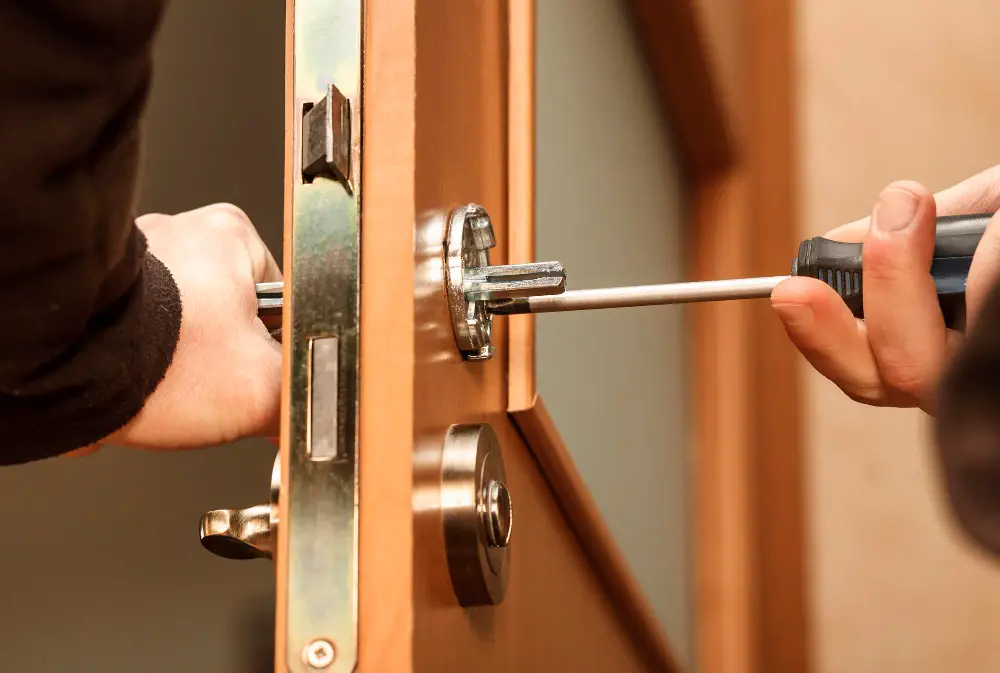
Drilling the Handle Hole
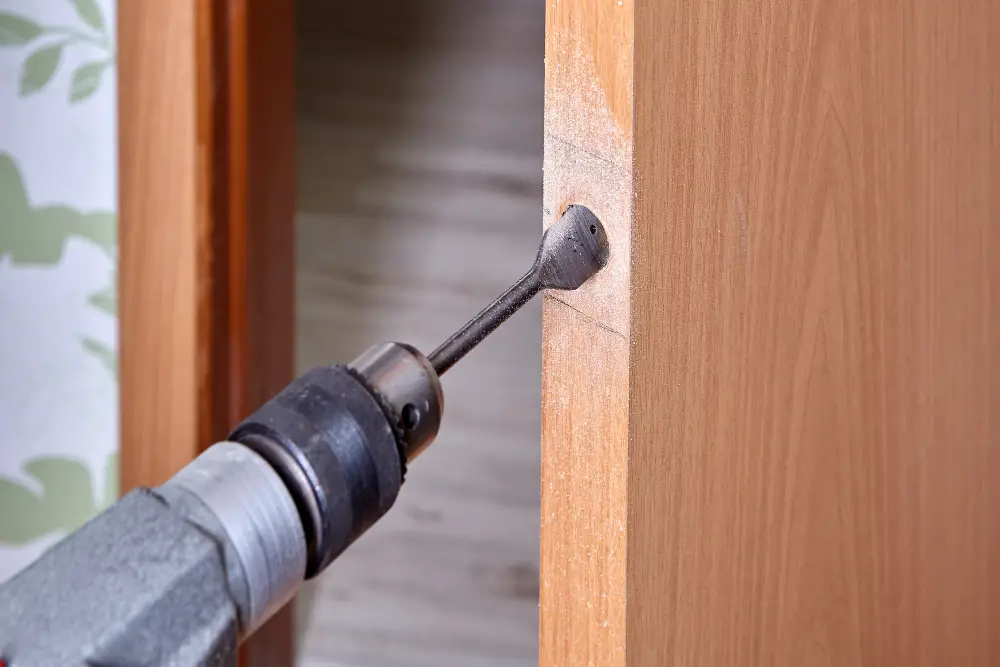
This step is crucial as it will determine how well your handle fits and functions on the door. To begin, measure and mark where you want to place your handle on both sides of the door using a pencil or marker.
Next, use a drill bit that matches the size of your chosen pocket door handle to create a pilot hole in one side of the marked area. Then flip over and repeat this process for drilling from the other side until both holes meet in between.
It’s important not to rush this step, as drilling too quickly can cause splintering or cracking around edges, which may affect functionality later down the line when installing a latch mechanism onto the handles themselves.
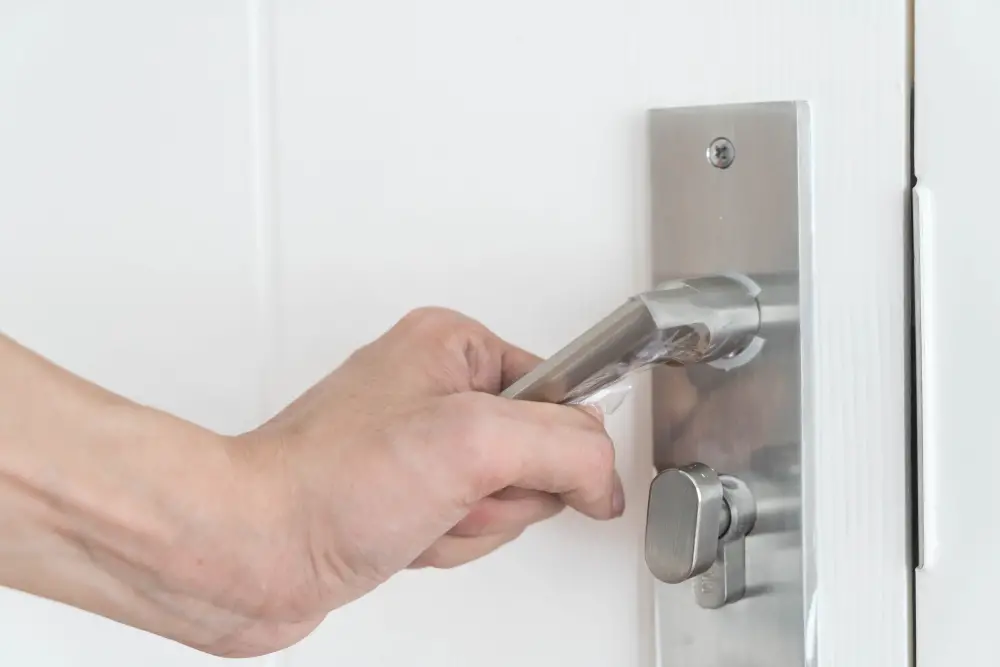
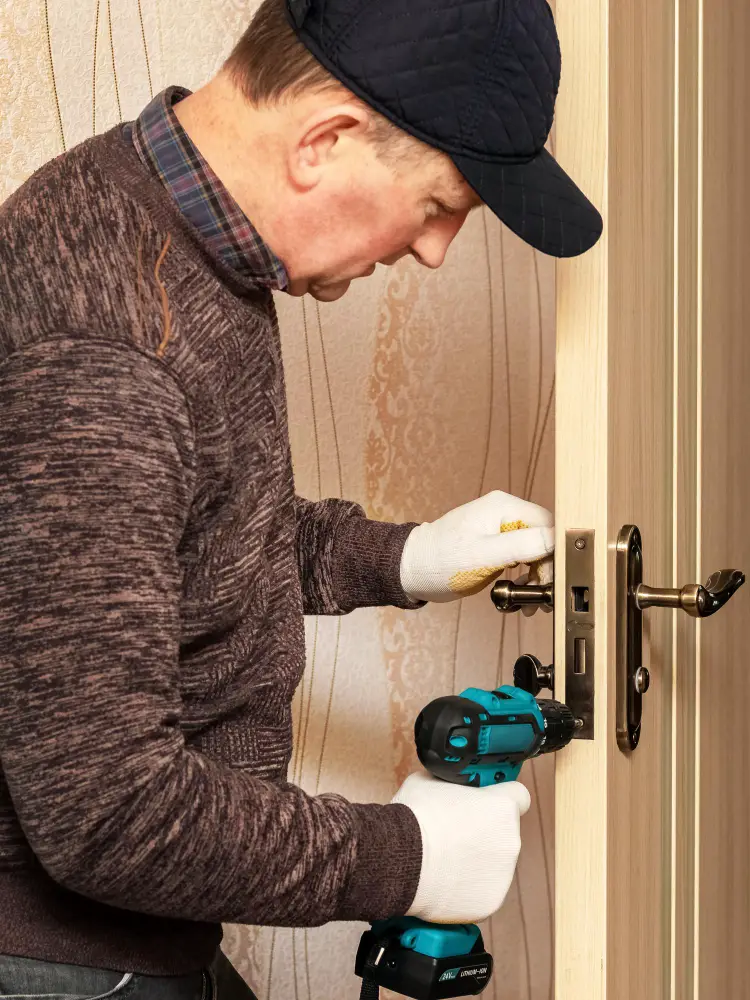
Fitting the Pocket Door Handle

Start by inserting the handle into the mortise and aligning it with your markings. Ensure that both sides of the handle are flush against each other and sit evenly on your door.
Next, use screws to secure both sides of your pocket door handles. Be careful not to over-tighten them, which can cause damage or misalignment.
After fitting both sides of your handles, test their functionality by sliding them open and closed several times. If everything works smoothly without any resistance or wobbling, then congratulations! You’ve successfully fitted a pocket door handle like a pro!
Installing the Latch Mechanism
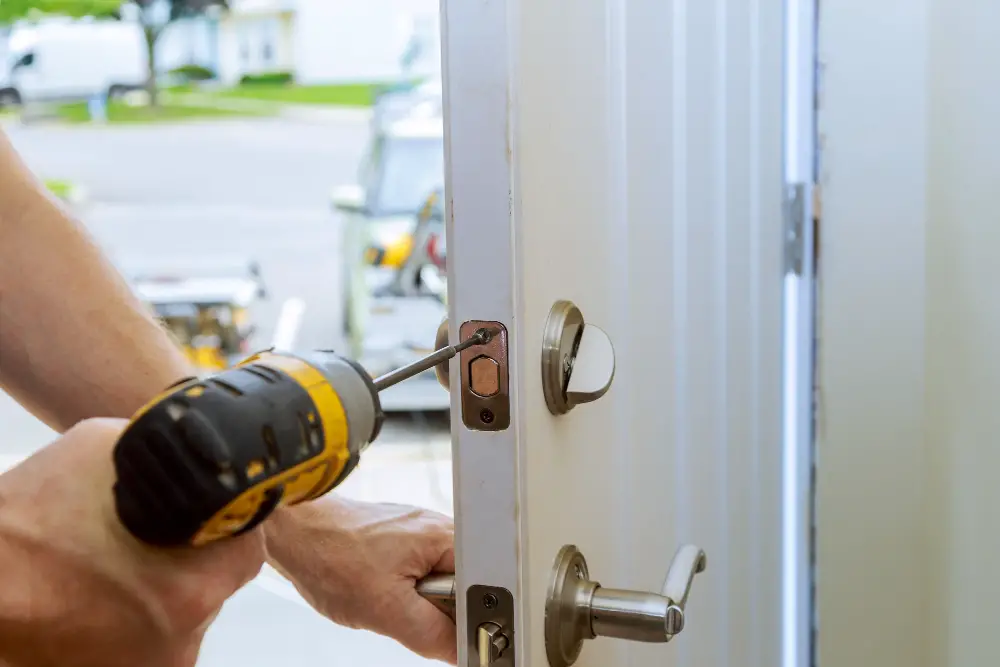
The latch mechanism keeps your pocket door securely closed and prevents it from sliding open unexpectedly. To install the latch mechanism, insert the lock into its designated hole on one side of the door.
Then, attach a strike plate to the opposite side of where you installed your lock so that when you close your pocket door, it will easily click into place.
Make sure that both sides are aligned properly before screwing them in place to avoid any issues with locking or unlocking later on down the line.
Testing the Door Handle Function
This will ensure the handle is properly aligned and securely attached to the door. To test your new pocket door handle, slide the door into its closed position and try turning the knob or lever.
The latch should engage smoothly without any resistance or sticking.
If you encounter any issues with your newly installed pocket door handle, don’t panic! It’s common for minor adjustments to be needed during installation. Ensure that all screws are tightened securely and that no debris obstructs the movement of either side of the latch mechanism.
Troubleshooting Common Issues
One issue is when the latch mechanism doesn’t align with the strike plate on the jamb, causing difficulty opening and closing. To fix this problem, adjust either or both components until adequately aligned.
Another issue is too much friction between the handle and latch mechanism due to improper installation or a misaligned mortise. This can cause difficulty turning, locking/unlocking your pocket door handle.
In such cases, check if any screws need tightening and ensure all parts are correctly installed.
Lastly, if you notice any squeaking sounds coming from your pocket door after installing a new handle; it could be due to loose hinges or worn-out rollers on its track system.
Pocket Door Handle Maintenance
Regular maintenance will ensure that your handle continues functioning smoothly for years. A loose or wobbly grip is one of the most common issues with pocket door handles.
Tighten the screws on either side of the handle using a screwdriver to fix this.
Another issue that can arise is difficulty in opening or closing the latch mechanism. This may be due to dirt or debris buildup inside the mechanism itself.
To clean it out, use a soft-bristled brush and some compressed air.
If you notice any wear and tear on your pocket door handle, such as scratches or dents, consider refinishing it with sandpaper and paint/stain as needed.
By following the step-by-step instructions outlined in this article, you can install your pocket door handle quickly. Remember to take accurate measurements and use caution when cutting into your door.
With practice and patience, you’ll soon have a functional and stylish addition to your home that will make opening doors effortless while adding an elegant touch of design flair!
FAQ
How high should a pocket door handle be?
The pocket door handle should be 36 inches off the floor, as it is the typical height and consistent with other door handles in the house.
What tools are required for mortising a pocket door handle?
A mortising chisel, a drill, a ruler, a utility knife, a square, and a corded or cordless drill are required for mortising a pocket door handle.
What are the different types of pocket door handles available?
Various types of pocket door handles are available, including flush pulls, edge pulls, locking handles, and privacy handles.
What are the essential steps for a successful pocket door handle installation?
Essential steps for a successful pocket door handle installation include measuring and marking the door, cutting the necessary holes, attaching the handle, and securing it firmly into place.


