Last updated on
If you’re an avid DIY fan or just someone who loves home improvement, then you’ll already be aware of the cost of tools today. Unfortunately, it can be so expensive to purchase all the necessary tools and equipment required for specific projects, so much so that it could put you off a project altogether!
Creating your own tools is a brilliant alternative. Not only will it save you money in the long run, but you will also develop new skills and have a fun new project to work on. Plus, when you use these tools on future DIYs, you can take pride in knowing you created the tools from scratch!
Table of Contents
Finding Materials
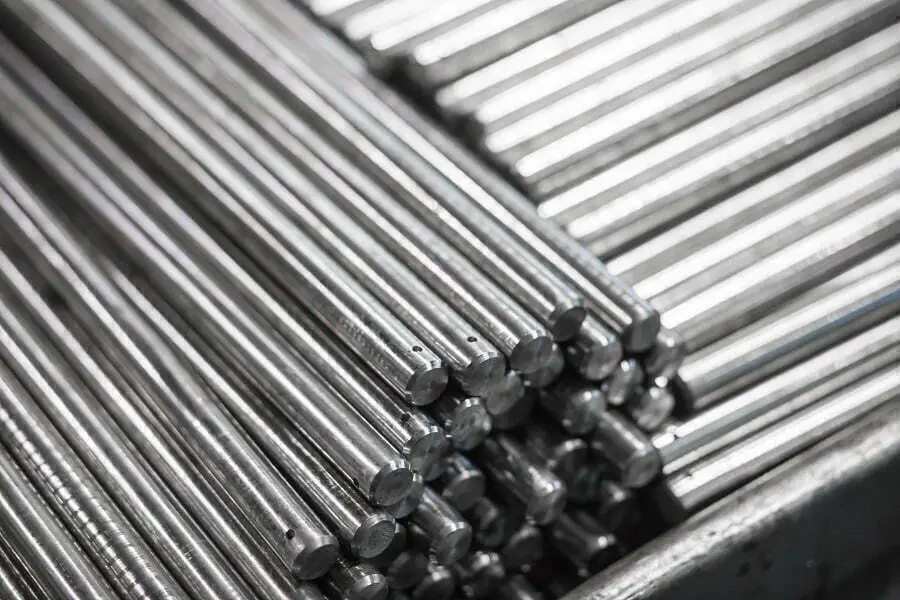
To get started, you need steel. As the name suggests, tool steel is the most appropriate type for creating tools. They are notable for their hardness, abrasion resistance, and they are also able to retain an edge under high temperatures.
As with all project materials, quality is vital. So while it may be tempting to save a few pounds here and there, it’s worth investing in high-quality tool steel that will last. You don’t want to go through the process of creating your own tool kit for it to break after just one use.
To prevent this from occurring, we recommend finding a trusted tool steel supplier like Gauge Plate Ltd, which sells all tool steel grades in various sizes with worldwide shipping.
Tool 1 – Saw
A hacksaw is a necessity for all toolkits. Start by bending a piece of flat bar steel into the shape of a hacksaw, with a curved loop for the handle. You can then use an existing blade or create your own by grinding and sharpening another piece of steel. Next, cut grooves into the ends of the saw frame you made – this is where you will insert the blade. Then, once it’s in place, use screws in the blade’s holes to act as pins. And there you have it, your very own handmade hacksaw.
Tool 2 – Pliers
If you are unfamiliar with simple blacksmithing, then it’s worth doing a bit of research before you begin to create the following tool. On the other hand, if you are familiar with the processes involved, let’s get started.
Similar to the hacksaw, you want to start with a flat steel bar and cut this into two equal-sized pieces. The size of these pieces depends ultimately on the size you’d like your pliers to be. Next, drill a hole in each piece and bolt them together to create the pivot point.
Then, begin heating the shorter end above the pivot point until it glows red. Once significantly heated, twist both bars simultaneously using an adjustable wrench. Once you’re happy with the bend, you want to quench the metal in order to secure it in place. Then finally, once cooled, you can cut the tips of the shorter, now twisted ends to a point to create your finished pliers.
Tool 3 – Drill
Just like the hacksaw, you want to start by bending a flat steel bar into the shape of a typical brace and bit drill. Then cap the top of the drill with either a piece of wood or PVC. Next, you want to make the handle so you can grip the drill without hurting yourself. To do so, simply grab a PVC pipe and create a narrow slit along its length before sliding it into place on the drill.
So, that’s the fundamental part of the drill all ready to go; now you just need drill bits. Use a hammer and a forge to create the desired tip shape. Drill bits are also a great way to recycle old metal scraps, like broken files or existing drill bits! To attach your drill bits to the drill, you need to forge one end of the flat bar into a fixed bit.
Using threading dies and couplings, you can also make your drill bits interchangeable, but we recommend keeping it simple and sticking with the fixed bits for your first attempt.
So, there you have it. Three tools that are essential in all toolkits that you can make yourself at home right now.
The best thing about making these tools is that you can then use them in the future to create more tools; it’s a gratifying process that we recommend to all DIY fans.
Related Posts
 The Journey of Authentic Buddha Statues from Asia
 What Is the Best Canada Coffee Subscription for Fresh Roasts?
 Commercial Plumbing Contractors: Infrastructure for Business Operations
 Top Corporate Gift Ideas To Impress Employees And Strengthen Workplace Appreciation
 Top Design Mistakes That Make Homes Feel Smaller (and How to Fix Them)