Last updated on
Unleashing creativity can transform redundant doors in your house into eye-catching design elements, because with a bit of ingenuity, even unused doors can become pieces of art that enhance your living space.
Transforming an unused door into a stylish and functional element is an innovative way to revamp your home decor. Whether it’s a closet door, room door, or an old barn door, there are countless creative ways to repurpose it or camouflage it seamlessly into your interior design.
From turning it into a bookshelf or a piece of art, to simply making it vanish with wallpaper, this article will guide you through a myriad of ideas to hide and utilize your unused doors. With every detail carefully explained, you’ll soon be inspired to embark on your next DIY project.
Table of Contents
Curtains to Conceal the Door
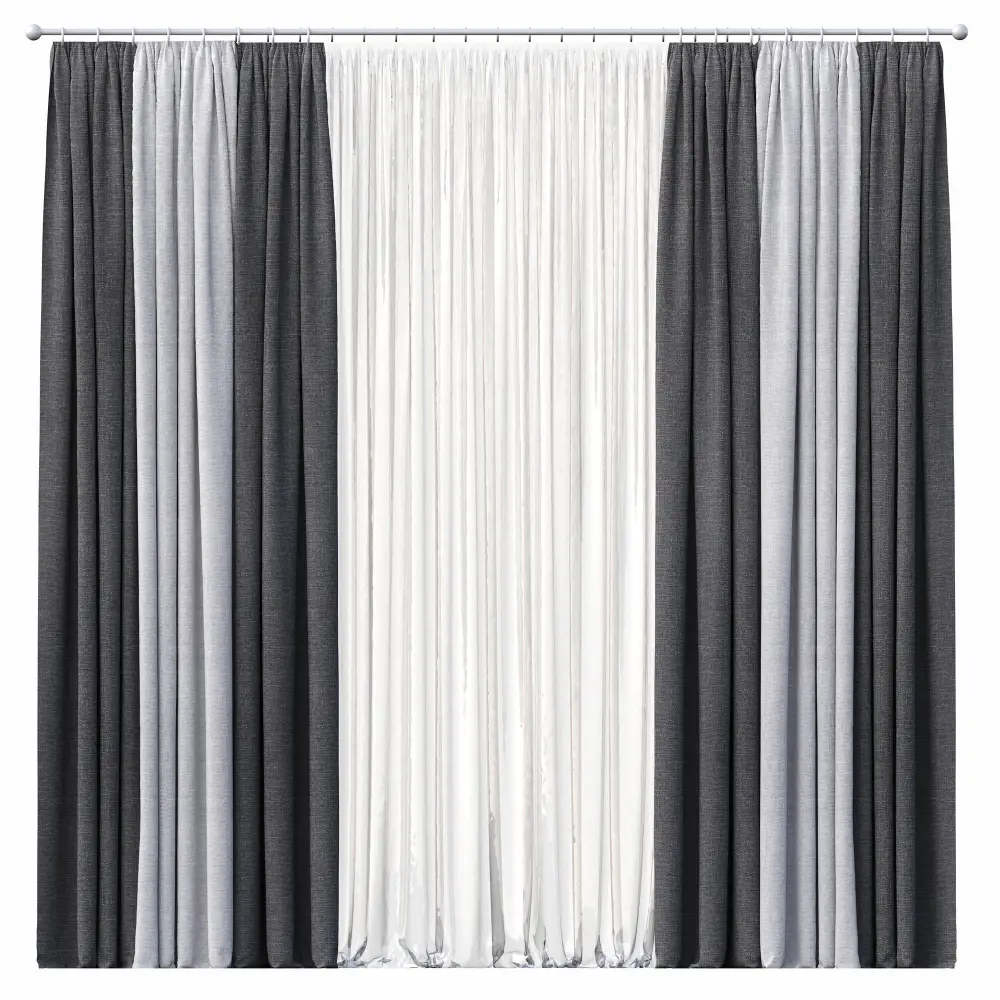
Using stylish curtains can be an effective way to conceal an unused door. Depending on the decor theme in your area, you can choose between different patterns and materials, like linen, silk, or even blackout curtains for complete concealment.
They can be hung from a rod or curtain rail installed above the door, allowing for easy access if the door is needed. Opt for full-length curtains to ensure complete coverage of the door, enhancing the illusion that it’s just another window or decorative piece.
This can add an unexpected design element to your space, giving the room a cozy vibe. Practical yet elegant, curtains serve a dual purpose of style and utility.
Painting the Door the Same Color As the Walls
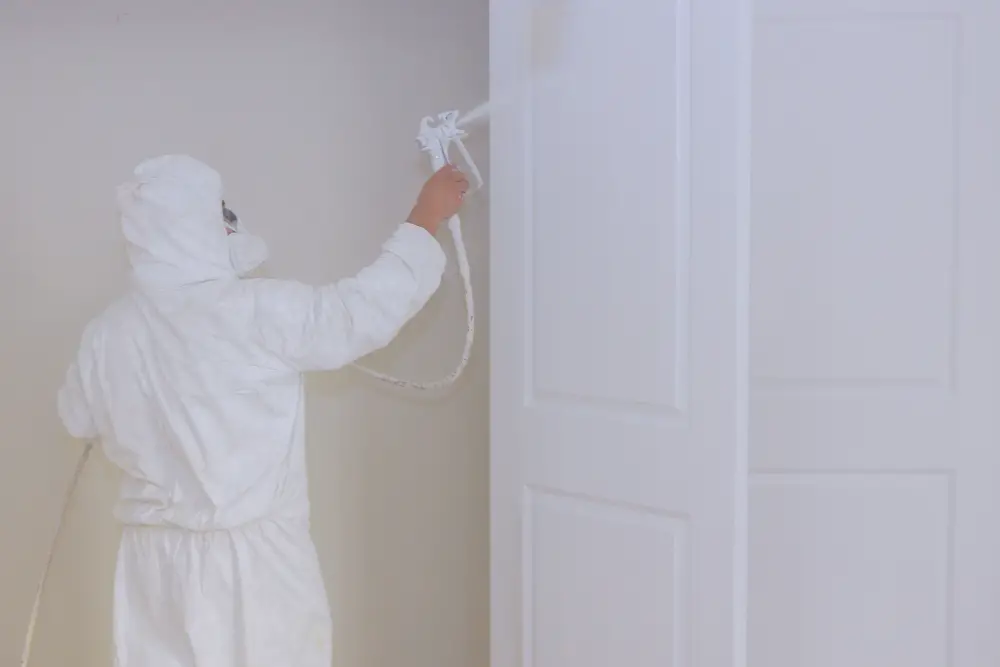
A simple yet effective solution is paint. Matching the door’s color to the surrounding walls can seamlessly camouflage it, maintaining the room’s aesthetic integrity.
To successfully achieve this, spend time selecting the right paint shade that complements your wall. Opt for matte or eggshell finishes which can lessen the door’s obviousness due to their non-reflective properties.
Depending on your wall texture, you may also consider adding texture to the door to ensure continuity.
Hiring a professional painter might be a good idea, as they can deftly handle painting details like door edges, hinges, and doorknobs.
Remember, the key is in the details, so if you aim for an almost invisible door, don’t overlook any element, no matter how small.
Use As Bookshelf or Cabinet Door
The transition from a mere door into a functional bookshelf or a cabinet door can adhere to two methods. Firstly, consider replacing your door with a pre-made bookshelf door. Handy and desirable, these unusual door substitutes are available in various designs, offering a traditional bookshelf feeling while keeping the functionality of a door.
Another method is location-dependent. If your unused door is in a corner, building a built-in bookshelf can be a perfect choice. Remember, this requires more construction and plastering work to make it seamless. Alternatively, if you’re working with an adequately robust door, attaching lightweight shelves directly onto the door itself can be an effective and straightforward method. Just ensure the shelves are securely mounted.
In both scenarios, the final outcome provides an aesthetically appealing and space-saving feature that doubles as a secret door. The crucial point is to maintain functionality without compromising on the room’s aesthetic appeal. Regardless of the approach, always consult with an expert or a seasoned DIYer, particularly if you’re drilling holes or handling plasterwork.
Installing a Full-length Mirror Over the Door
This method works perfectly for both functionality and design, as mirrors are beautiful decor pieces that create the illusion of a larger space while also offering practical use. Ensure the mirror dimensions align with those of the door for a streamlined look. With the right tools, the installation process can be straightforward.
- 1. Choose a mirror style that matches your room decor to maintain unity.
- 2. For safety, use a mirror designed to resist shattering, or add a security film.
- 3. Use mirror mastic or strong adhesive for secure attachment, but remember neither are easily removable. They can damage paint upon removal.
- 4. If opting for temporary attachment, consider using mirror mounting clips or over-the-door hooks.
- 5. To avoid accidents, make sure the mirror is fixed firmly before letting go. It might be a challenging job for one person alone.
- 6. Always double-check measurements. If the mirror is too large or too small, it can give an unbalanced look or might not fulfill the intended goal.
This creative approach can add a touch of luxury to your room while effectively hiding an unused door.
Covering Door With Removable Wallpaper

An excellent way to breathe new life into a door that’s not in use is to adorn it with removable wallpaper. This decorating solution not only keeps your door incognito but also adds a pop of color and personality to your room.
Here are easy steps to accomplish this tasteful transformation:
- Measure the door to determine how much wallpaper is required.
- Choose a pattern that complements the room’s color scheme and decor.
- Ensure surface is clean and dry for optimal adhesion.
- Start from the top and work your way down, smoothing out any bubbles or wrinkles as you go.
- Trim the excess paper at the base and around the door handle.
Remember, the beauty of using removable wallpaper is the freedom to change it when the mood strikes, or when looking to revamp your space with minimal effort and expense.
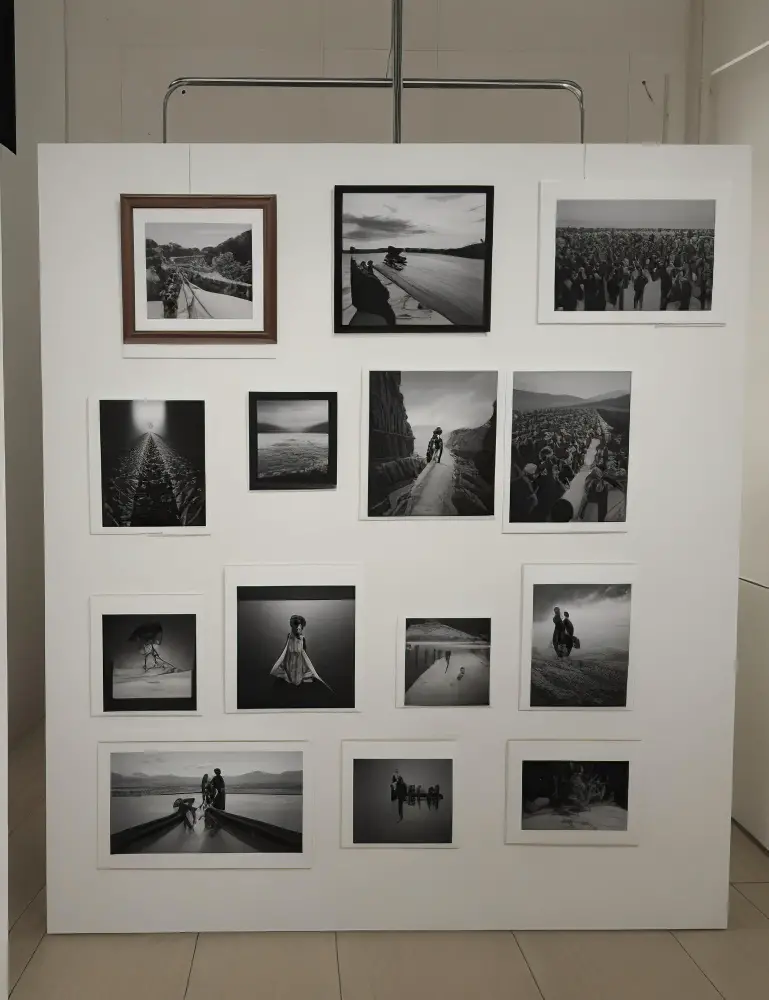
Creating a Photo Wall Over the Door
Start by carefully selecting your favorite photos or prints, keeping in mind the color scheme and theme. Aim for a mix of shapes, sizes, and frames to create a dynamic, appealing visual impact. Consider the door layout when arranging each piece, as this will affect the overall look. In addition, using removable photo wall stickers can help prevent damaging the door.
Next, lay your photos out on the floor to play around with the arrangement – this helps visualize the final outcome better. Keep a balanced display, play with symmetry, and err on the side of spacing images close together for a cohesive look.
Once you’re satisfied with the setup, mark the hanging points on the door. It’s advisable to use lightweight frames or photo clips to avoid adding too much weight to the door. Also, use adhesive strips designed for walls as these won’t peel off the paint when removed.
As an aside, you might want to maintain an updated collection by varying the photos according to the season. This not only masks the door, but also adds a personal, evolving element to your space. Be sure to use acid-free photo adhesives or corners to avoid damaging the images.
Lastly, remove any distractions nearby so the photo display can really serve as a focal point. With careful selection and execution, a photo wall can transform an unused door into a captivating, meaningful piece of art.
Adding a Tapestry to Hide the Door
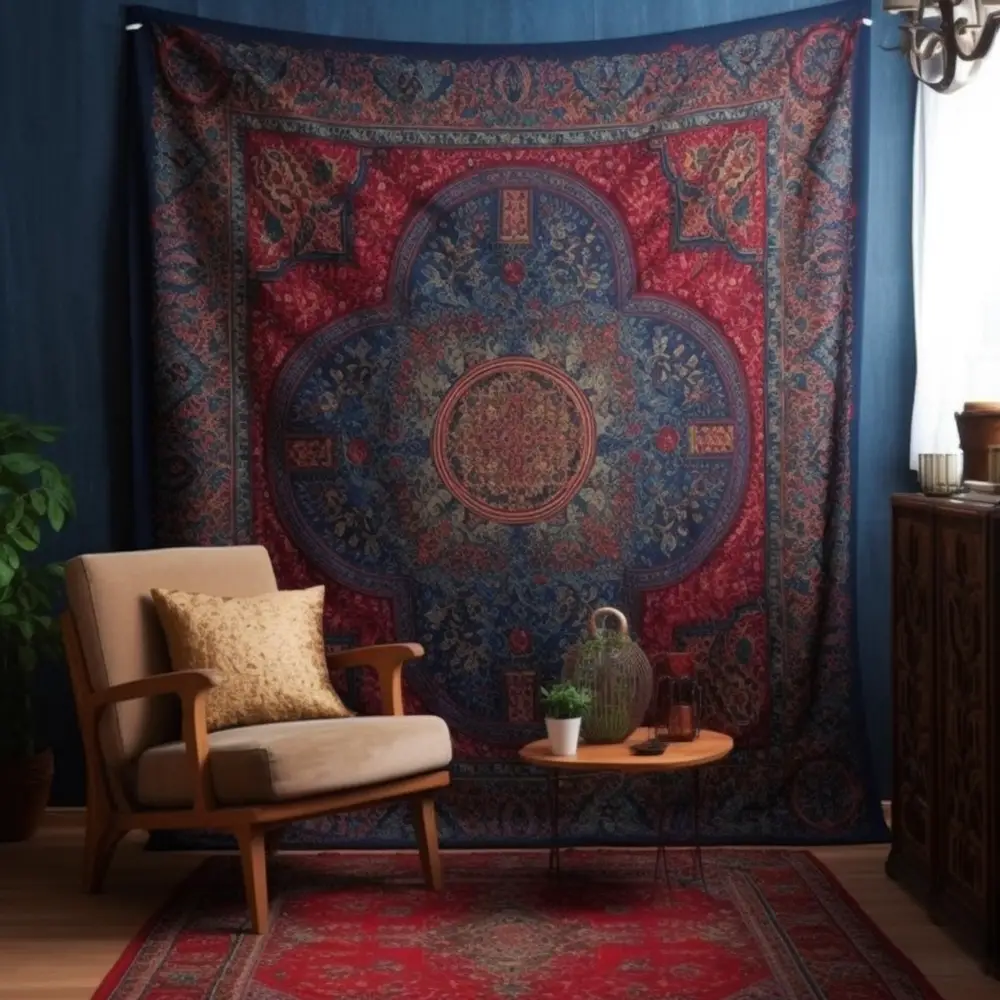
A beautiful tapestry not only serves as an eye-catching focal point but also doubles as an effective disguise for unused doors. The trick is to select a tapestry that complements the existing design scheme and color palette of the room.
To get started, first measure the dimensions of your door. This ensures the tapestry is the right fit, completely covering it without excess fabric hanging off the sides. Next, purchasing a rod and brackets for hanging the tapestry is key. Ensure that they are sturdy enough to hold the weight of the fabric piece.
When installing the tapestry rod, it’s best to position it slightly above the door frame. This creates a seamless look, making the tapestry appear more like a work of art rather than a practical cover-up.
With the tapestry in place, it does not only mask an underutilized door but introduces a new element of texture and visual interest into the room. Remember that you can also layer your tapestries for an even more vibrant and substantial feel.
From vibrant geometric patterns to tranquil landscape scenes, there is a wide range of tapestries available to suit diverse tastes. So, have fun exploring and choosing one that perfectly expresses your style and personality.
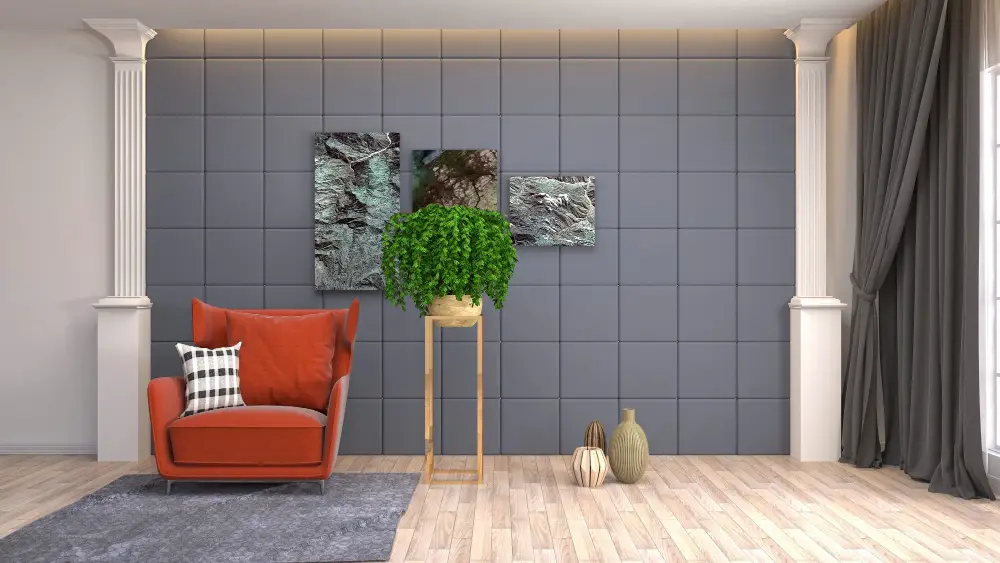
Transforming the Door Into an Art Display
Delving into this concept, transforming your unused door into an art display presents an excellent opportunity for personal expression and gives your space a unique and creative touch. Here are a few tips to achieve this:
1. Choose artwork – Paintings, sketches or photos, choose pieces that tie into your existing décor. The art should embody something significant to you or simply bolster your room’s aesthetic.
2. Grouping – For a cohesive appeal, group your artwork. Consider using the same frames or spacing them evenly to create an organized look.
3. Frame positioning – Hanging pieces of different sizes? Start at eye level. This should be the focal point, around which you can add the other frames.
4. Lighting – Proper lighting is crucial to highlight your artistic display. Installing spotlights or pendants can add the desired effect.
5. Variety – Consider adding wall sculptures or floating shelves with additional decorative pieces to add depth and intrigue.
Remember, the goal is to create a seamless flow from the artwork to the rest of your room, fostering a harmonious, well-appointed aesthetic.
Using a Tall Plant to Obstruct View
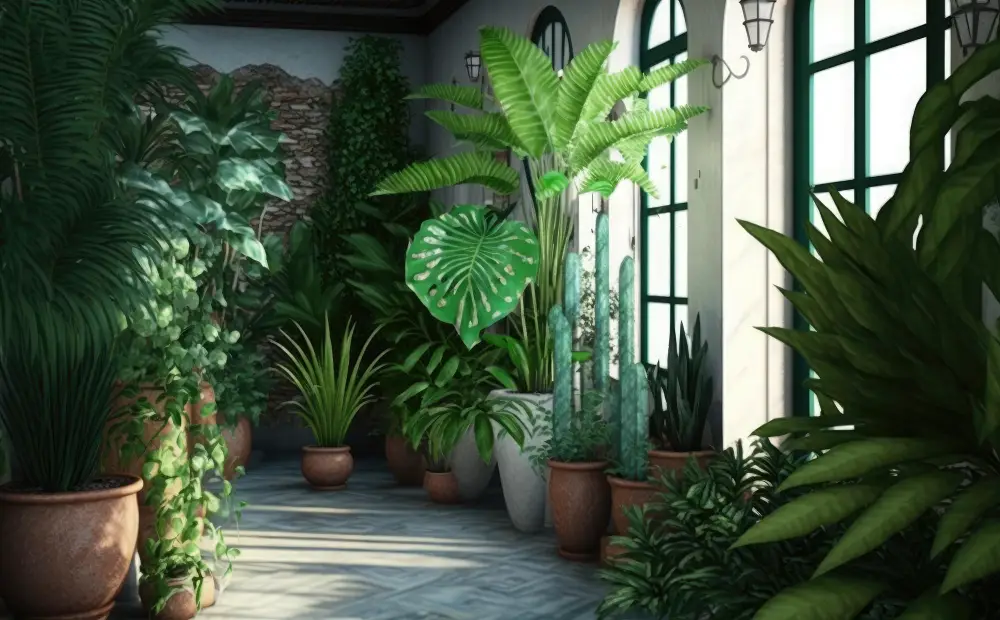
Choosing a lush indoor tree can artfully disguise an unused doorway. It’s aesthetic and environmentally friendly.
Make sure to pick a variety that suits the light conditions of your space. A Ficus or Monstera would do well in bright, indirect light, whereas a Snake Plant or ZZ Plant can thrive in lower light conditions.
Invest in a stylish planter that complements your interior design for an extra touch of elegance. Remember to prune your plant regularly to maintain its shape and health while ensuring it continues to conceal the door effectively.
Installing a Room Divider or Screen in Front
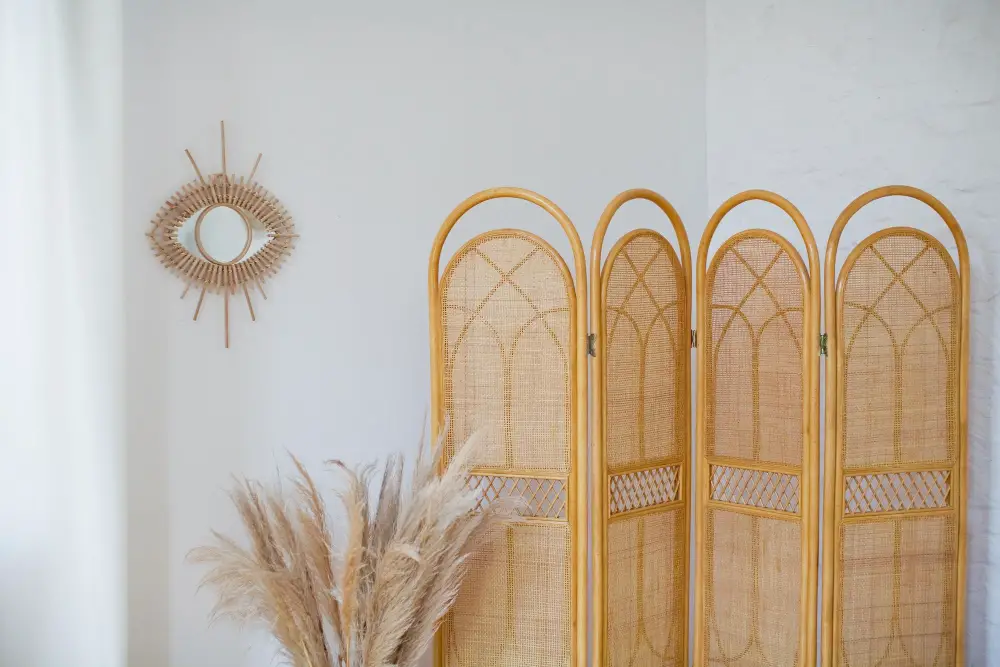
To execute this ingenious idea, start by measuring the height and width of the door, ensuring the room divider or screen adequately hides it. Opt for a folding design to allow for functional flexibility and easy transportation.
The style and color should complement the room’s decor. For a more customized appearance, consider a DIY room divider — a simple project involving a few wooden panels and your favorite fabric or wallpaper. It’s an ideal solution for renters, as it requires no modifications to the door itself and can be easily removed when necessary.
Additionally, a divider can bring added visual interest to your space and even serve as a conversation starter when welcoming guests. Regardless of your choice, always prioritize stability for an aesthetic and safe solution.
Using a Sliding Door to Serve As a Decor Piece
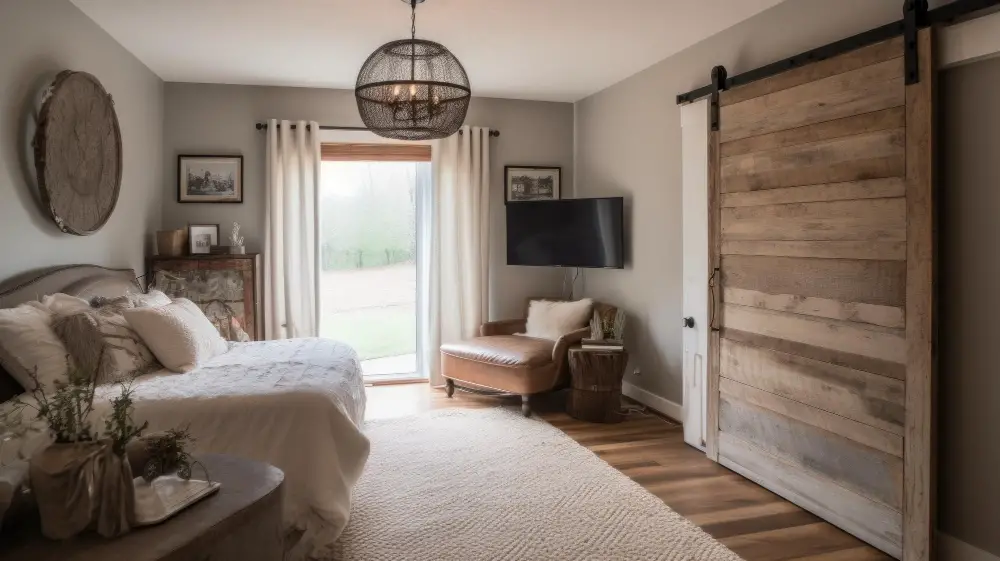
One visually appealing and versatile strategy is opting for a sliding door. Serving more than just a practical function, it can easily become a focal point. Choose a pair with a design that complements the room’s aesthetic for maximum effect.
Consider a rustic barn door for a country-chic look or a modern panel with frosted glass for a sleek, contemporary style.
Functionally, sliding doors offer easy access, making them an excellent choice when dealing with limited space. You can conveniently slide them open when needed and close again without hindrance. They also allow for flexibility in arranging the room’s layout without worrying about door swing space.
However, keep in mind that sliding doors require a clear expanse along the wall to slide. Make sure to avoid placing furniture or other obstacles in their pathway for smooth operation. Also, don’t forget about hardware. Choose a track and handles that blend harmoniously with the door and room’s overall design.
With a thoughtfully chosen design and careful placement, a sliding door can be a beautiful and functional addition, adding a touch of personality and uniqueness to your space.
Covering With Wall-mounted Fabric Panels
To implement this idea, you’ll need a suitable fabric panel, which you can find in a variety of patterns and colors aligning with your interior theme. These panels are easy to install and usually come with their own mounting hardware.
To begin, measure the width and height of the door, then obtain a fabric panel of similar dimensions. Mount it directly over the unwanted door. Ensure it sits flush with the surrounding wall for a seamless look.
Using fabric panels not only camouflages the door but also adds to the overall aesthetics. This approach is particularly beneficial if your home carries a vintage or chic style. The fabric can also function as a sound insulator, serving a dual purpose in spaces like home offices or bedrooms.
Bear in mind, the fabric choice is crucial; opt for sturdy, easy-to-clean materials for long-lasting results. Choosing the right pattern and color can add depth, creating a focal point in your room while efficiently masking the unused door.
Remember, you can easily switch out fabric panels whenever you want to refresh your room’s look – a versatile, affordable, and functional solution to hiding unwanted doors.
Attaching a Magnetic Board for Notes or Drawings
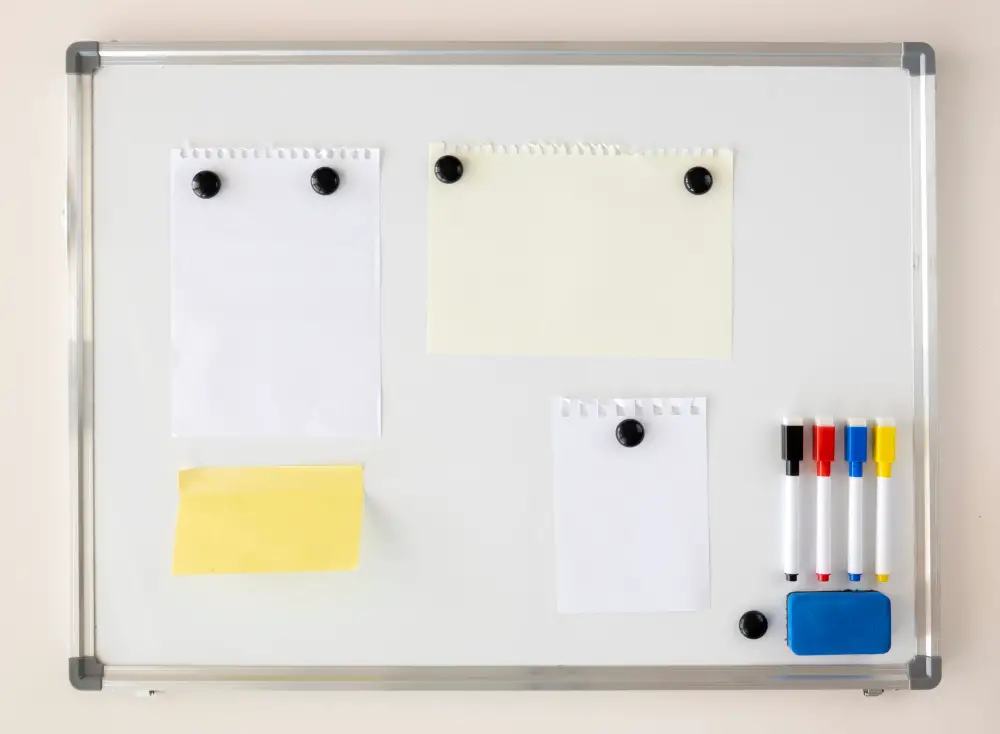
Implementing a magnetic board comes with ample benefits. Firstly, it’s a fun and functional way to mask an unused door. It instantly transforms a dull object into a dynamic hub for daily reminders, treasured photographs, or kids’ masterpieces, creating an engaging visual spot in your home.
Secondly, it’s a highly customizable option. Boards come in various sizes and styles, from sleek stainless steel to vibrant shades that can match any decor. Just remember to accurately measure your door before purchasing to ensure a seamless fit.
Thirdly, this option involves minimal effort to install. Many magnetic boards come with mounting hardware, reducing the time you’d spend installing to just a few minutes. But, before mounting, always check the door’s material. Metal doors warp magnetic capabilities, so applying a magnet-friendly board seems redundant.
Finally, magnetic boards are easily changeable and updatable. Different themes and displays can be achieved for occasions or seasons, making your space lively and ever-evolving.
To sum it up, by opting for a magnetic board, you’re not just hiding an unused door; you’re incorporating a versatile and ever-changing aspect to your home decor.
Turning the Door Into a Chalkboard

Chalkboard paint is a wonderful tool to convert your unused door into a functional and fun part of the household. By following a few simple steps, it can quickly transform into a communication hub, shopping list, or a canvas for small (and not so small!) artists at home.
Firstly, you’ll need to choose your paint. Chalkboard paint is readily available in many home improvement stores and online. Be sure to select a color that complements your interior decor.
Then, preparation is key. Clean the door thoroughly and sand it lightly to achieve the smoothest surface possible. Once cleaned and sanded, apply a high-quality primer. This provides a suitable surface for the chalkboard paint and helps it adhere properly.
After the primer has dried, you can now apply your chalkboard paint using a roller or brush, ensuring you follow the instructions on your specific paint for best results. Usually, two coats will suffice for a rich, strong color. Make sure to dry thoroughly between coats.
Finally, once your door is completely dry, it’s time to ‘season’ the chalkboard. This involves taking a piece of chalk, lying it flat, and covering the whole surface in chalk, then carefully wiping it off. This ensures future writings and drawings can be easily erased.
Quite a versatile and interactive idea, isn’t it? You can now enjoy your new scribble pad, list manager, or art board. It’ll certainly add a spark of creativity to your home!
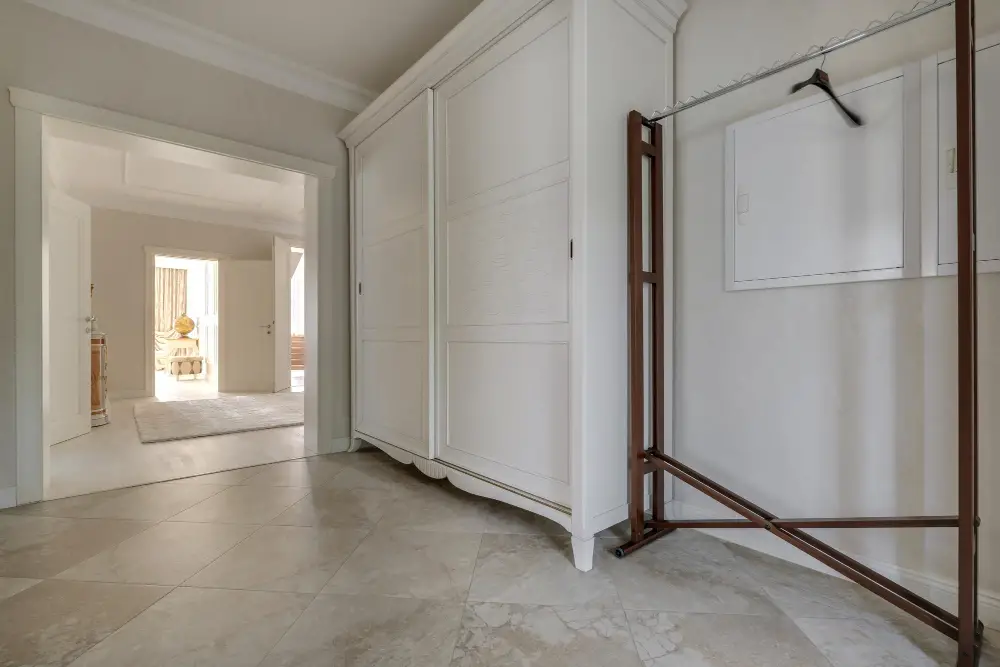
Hide It Behind Movable Furniture Like a Large Armoire
This method is quite practical and offers a dual purpose; not only does it conceal the unused door, but it also provides extra storage space.
Choose a large piece of furniture that matches your room’s style, one that’s tall and wide enough to cover the door completely.
Armoires, tall bookcases, or a shelving unit can work well.
Consider the weight and stability, especially if you live in a home with children or pets.
Ensure that the furniture piece is sturdy and secure, use brackets for added safety.
Last but not least, assess the mobility of the furniture.
It should be easy to move aside should you ever need to access the door.
This idea affords flexibility as you can change out the furniture over time to give your room a fresh look without needing to touch the door again.
Plus, who doesn’t appreciate some extra storage?
Be it for books, decorations, or clothes, it could always come in handy.
Just remember, the goal is to beautify your space while ensuring functionality and practicality.
Applying a Mural or Wall Stickers
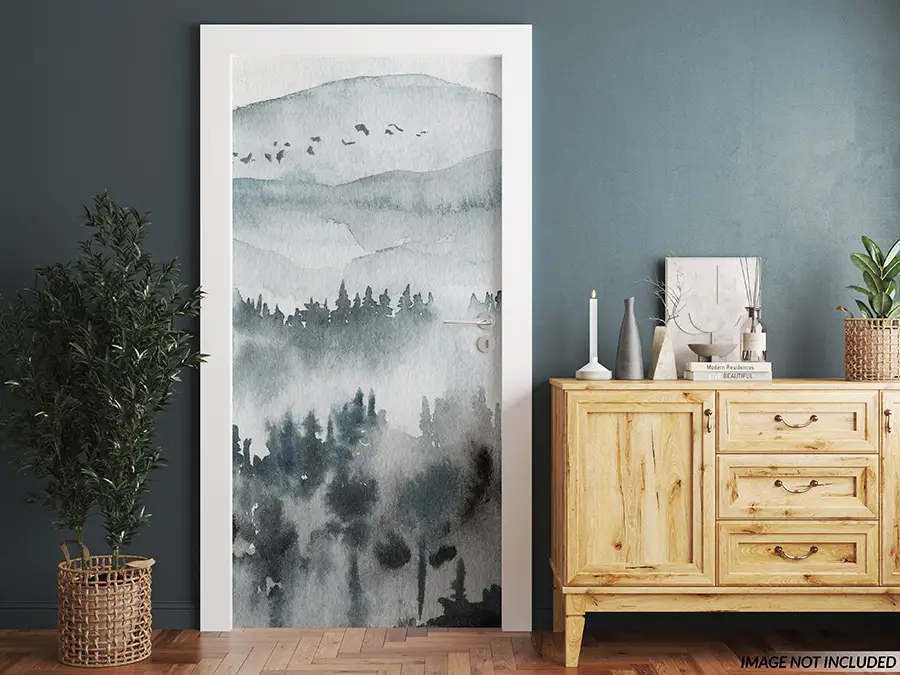
Think of a mural as an aesthetic veil that complements your home decor while cleverly concealing an unused door. Working with a variety of styles and designs, murals offer an artistic twist to your space.
Wall stickers, on the other hand, are a quick, hassle-free option. Given their adhesive nature, these can be easily applied directly onto the door surface. They come in a myriad of patterns and images to suit your design needs.
To choose, consider the overall theme and color scheme of your room. Opt for a mural that would seamlessly blend in, or pick vibrant wall stickers to add a fun element. Always measure the door accurately before making a purchase to ensure a perfect fit.
As for installation, murals may require a professional for a smoother finish. In contrast, stickers can be a fun DIY venture. Once installed, regular maintenance and dusting will ensure their longevity.
This technique not only hides the unused door but also acts as a design statement, injecting character into your living space. Remember, the key lies in choosing the right design that fits your existing decor and your personality.
Replacing the Door With a Hidden Door Design
Heading for a lofty design with a hint of mystery?
Invisible doors, also known as hidden doors, can give your space a surprising element while keeping the unused door subtle. Essentially, these innovative door designs blend seamlessly with the adjoining wall, making it virtually invisible when closed.
Here are a few essentials to consider:
- 1. Material: The door should be made of the same material as your wall. Using the same wall panels or tiles can nail the invisible effect.
- 2. Seams: Pay attention to seams. The goal is to make them as undetectable as possible. Hidden hinges and flush handles work well.
- 3. Color and Pattern: Make sure the paint color or wallpaper pattern matches the adjoining wall exactly. Any difference could give the location away.
- 4. Functionality: A door is still a door – it has to open! Consider if you prefer it to swing out or slide into the wall. Both options can work but it will impact installation.
Combining style with subtlety, hidden doors offer a sleek solution for unused doors. Dare to be different!
Installing a Floating Shelf or Hangers for Clothes
Floating shelves can offer both functionality and aesthetics when using to disguise an unused door. By installing these shelves at various levels on the door, you create ample space for home décor items or books.
Pair them with aesthetic spotlighting to highlight showpieces and add an illuminated ambience to the room. Hangers, on the other hand, can be strategically placed for hanging clothes or accessories. Stick to sleek, modern designs so they act as décor even when not in use.
Ensure these fixtures are appropriately secured to the door for firmness and safety. Moreover, remember that door operation must not be hindered if the need to use it arises.
Use the Door As a Backdrop for a Home Office
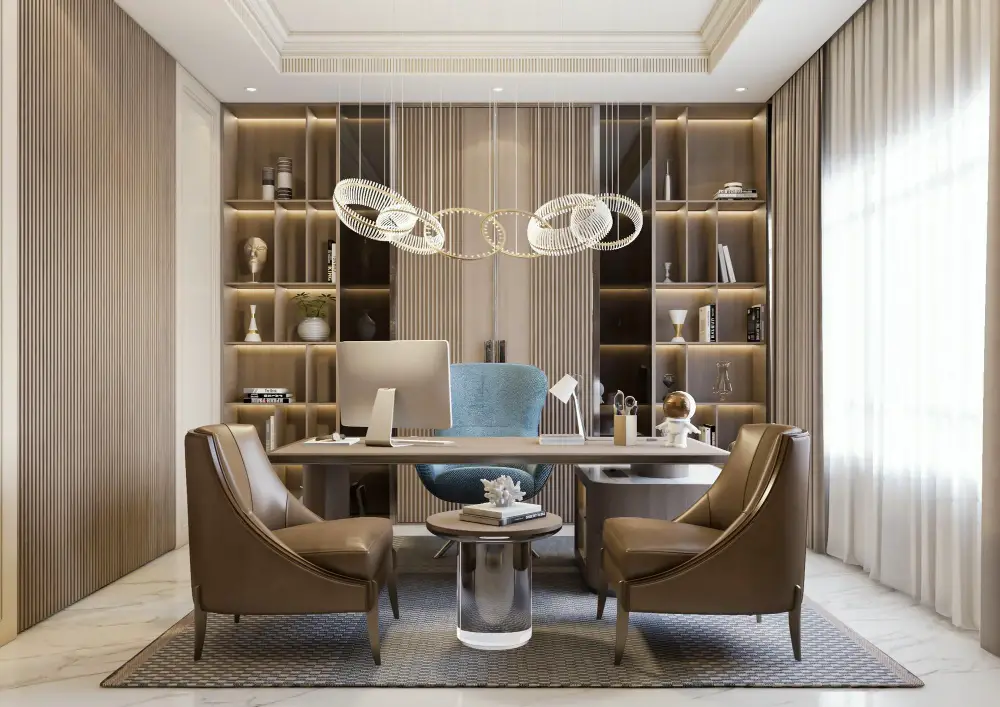
Turning an unused door into a home office backdrop is both innovative and functional. Begin by clearing the area around the door to create a clean canvas. Install a floating desk, ensure it is at the right height for your office chair to provide comfort during work hours. Choose a desk with built-in storage to help declutter and organize your workspace.
Next, consider adding some open shelves above the desk. These not only make use of the vertical space but also provide room to display books, plants, or awards. Opt for materials and finishes that complement your interior style, ensuring aesthetics is not compromised.
Ensure sufficient lighting. If the door area lacks natural light, include a desk lamp or mount wall lights. This serves a dual purpose – necessary task lighting for work and a spotlight for your office background during video calls.
Last**l**y, personalize the space. This can be as simple as adding a bulletin board for important notes, a framed certificate, or a small artwork. Remember, this is a working space, so keep it minimal and distraction-free.
Remember, the goal is to blend the door organically into the design, making it unnoticeable while fully functional as your home office backdrop.
Adorning the Door With a Decorative Room Separator
Choosing a decorative room separator offers a dual function. Not only does it obscure an unused door, it also adds a touch of elegance to the room.
To achieve this effect, select a divider that complements your overall decor. Different materials, like wood, metal or fabric, can create varying aesthetics, so ensure you choose one that aligns with your personal style.
Managing the placement of the divider is also crucial. It should be positioned to subtly hide the door without blocking access to other areas.
Folding screens are a fantastic choice due to their adaptability and convenience. They also offer an easy way to change up your room design without committing to permanent modifications.
Just remember to ensure the selected room divider stands securely and consider anchoring it to prevent any accidents if it’s in a high-traffic area.


