Last updated on
Explore the transformative power of a leather repair patch because it has the potential to quickly renew and extend the life of your beloved leather items.
Key takeaways:
- Leather repair patches are cost-effective alternatives to professional repairs.
- Patches can blend seamlessly with existing leather, maintaining its aesthetic appeal.
- Different types of leather patches are available, including adhesive-backed and non-adhesive patches.
- It’s important to choose the right color and texture for a seamless repair.
- Leather repair patches have various practical applications, from furniture restoration to automotive interior repair.
Table of Contents
Benefits of Using a Leather Repair Patch
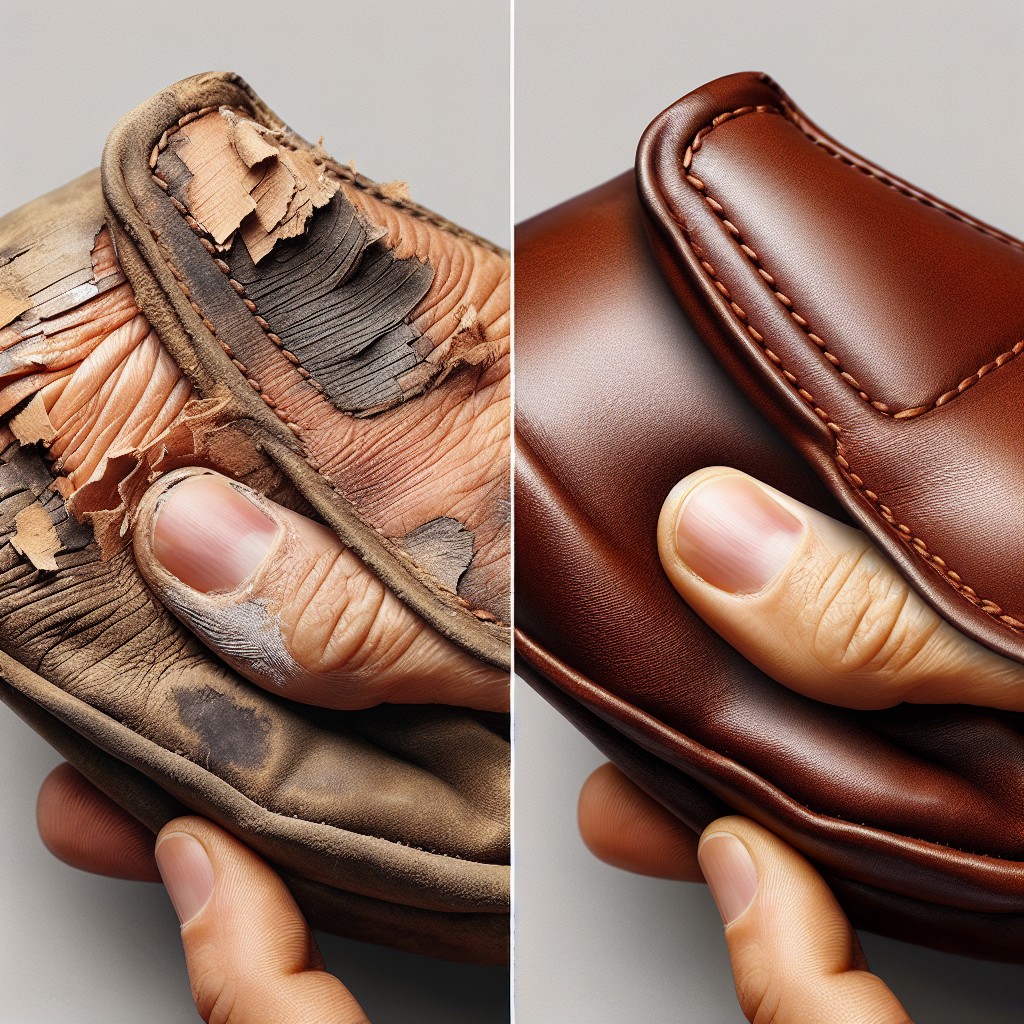
Leather repair patches offer an efficient solution to restoring the look and functionality of damaged leather items. They provide a cost-effective alternative to professional repairs or having to purchase replacement items.
These adhesive-backed patches can conceal holes, tears, scratches, and other surface damage, thereby extending the life of the leather product.
With the use of these patches, there is a convenient DIY approach that saves time – no need for sewing or the use of special tools. This also makes them accessible to those without advanced repair skills. The patches’ flexibility allows them to blend seamlessly with the existing material, maintaining the item’s aesthetic appeal.
Furthermore, using a repair patch may preserve the originality of vintage or cherished items that would otherwise lose their character if reupholstered entirely. The patches can also strengthen weak areas, preventing further tearing and reducing the likelihood of future damages. This simple maintenance measure not only protects the item but also maintains its value.
Types of Leather Patches Available
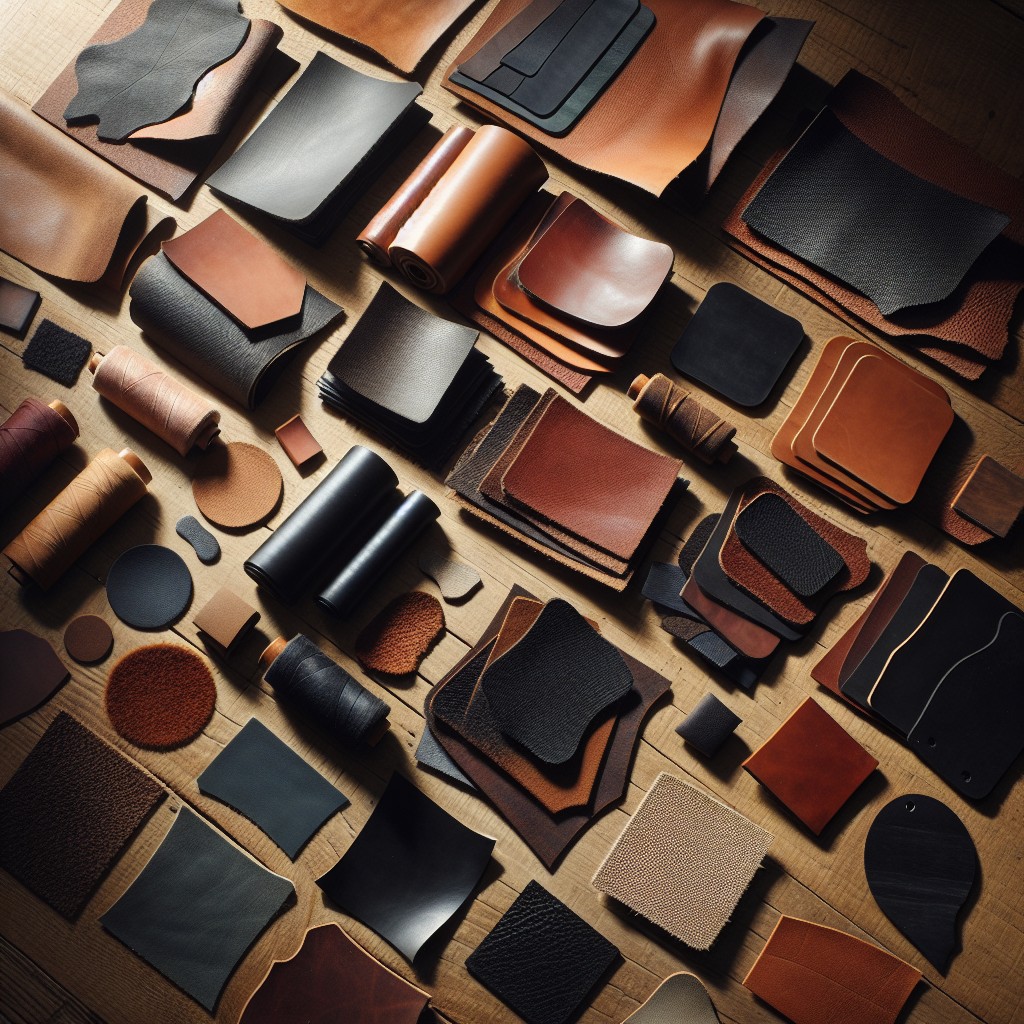
Leather patches come in various materials, including genuine leather, faux leather, and PU leather, each offering different aesthetic and functional benefits.
They are also available in a range of sizes, from small circles to large sheets, to accommodate different repair needs.
Adhesive-backed patches offer a convenient stick-and-press application, while non-adhesive patches might require sewing or a specific leather adhesive for application.
Moreover, some are pre-cut in shapes like rectangles or squares, and others can be customized to cover irregular damage.
Textured options are designed to mimic specific leather finishes, such as pebbled or smooth, ensuring a seamless blend with the original material.
Choosing the Right Color and Texture
Identifying the closest match to the original leather’s hue is crucial; even slight variations in color can make repairs noticeable. It’s often helpful to compare against natural light for accuracy.
In addition to color, the texture needs to mirror the existing material. Leather can range from smooth and glossy to pebbled and matte. Some repair kits provide a variety of textures, or one might utilize a grain paper during the repair process to imprint a similar texture onto the patch.
For those unable to find an exact match, opting for a slightly darker shade rather than a lighter one is advisable as it tends to blend more seamlessly. In multi-color or patterned areas, custom mixing repair solutions available in some kits can come to the rescue, allowing for a better camouflage of the repair site.
Lastly, for high-use areas, selecting a patch with a rugged texture can provide extra durability and longevity to the repair.
Application Process for Leather Repair Patches
Begin by ensuring the area needing repair is clean and dry; any dirt or moisture can hinder adhesion.
Next, measure the damaged spot and cut the patch to size, allowing for a small overlap to provide a secure hold.
Most patches come with a pre-applied adhesive backing. Simply peel off the protective layer, carefully position the patch over the defect, and press firmly.
For optimal results, use a roller or flat object to smooth out any air bubbles and secure the bond.
It’s crucial to allow ample time for the adhesive to set, as per the manufacturer’s instructions, before using the item.
Regular checks on the edges of the patch can help catch any lifting early to reinforce the adhesion if necessary.
Common Uses for Leather Repair Tape and Patches
Leather repair tape and patches are versatile tools designed to extend the life of various leather goods. They are commonly used to mend cuts, scratches, and holes that may occur over time. Here’s a look into their practical applications:
- Furniture Restoration: A prime use is refurbishing sofas, armchairs, and ottomans. This approach restores the aesthetics and functionality while preventing further deterioration of the material.
- Automotive Interior Repair: Car seats and steering wheels that have succumbed to wear and tear benefit from a well-matched patch, bringing back the vehicle’s original refined look.
- Fashion Fixes: Jackets, belts, and handbags are often susceptible to scuffs and tears. Patches offer a quick fix that blends in and holds up with regular use.
- Equestrian Equipment: Saddles and riding gear can experience significant stress, and using patches helps maintain the integrity of these items.
- Pet Furniture: Chewed corners or claw marks on pet beds and accessories can be easily mended with a sturdy patch, providing a cost-effective solution compared to replacements.
By addressing issues promptly with a repair patch, the overall longevity of leather items can be significantly improved. These adhesive solutions allow for simple, yet effective, do-it-yourself repairs that maintain the look and feel of genuine leather.
Maintenance and Care for Repaired Leather
Ensuring the longevity of a leather repair begins with proper maintenance and care post-application. Here are some essential tips:
- Keep repaired leather away from direct sunlight to prevent the patch from fading or the adhesive from weakening.
- Apply a leather conditioner around the patched area periodically to maintain the flexibility and prevent the edges from lifting.
- Avoid using sharp objects near the repaired section to maintain the integrity of the repair.
- Clean the surface regularly with a soft, damp cloth, followed by a dry cloth, to prevent dust and dirt from accumulating and scratching the leather.
- Refrain from using harsh chemicals or abrasive cleaners that could damage both the original leather and the repair material.
- Handle repaired items with care, particularly during the first few days, to allow the adhesive to set fully and create a strong bond.
Comparing Different Brands of Leather Repair Kits
When comparing leather repair kits, it’s important to consider the adhesive strength, color matching accuracy, and the flexibility of the repair material. Brands like MastaPlasta offer pre-cut patches that are quick to apply, while others, such as Coconix and Fortivo, provide liquid repair solutions that may offer more precision for small damage.
It’s also crucial to check whether a kit is suitable for your specific leather type, be it genuine, PU, or vinyl. Additionally, kits with a variety of colors enable better matches for unique shades, and some may even include tools to customize the tint. Customer reviews often shed light on the longevity of the repair and the quality of customer support, which can be a tiebreaker if you’re torn between options.
Remember, the goal is to ensure a seamless mend that restores your leather’s appearance and utility.
Instructional Video for Leather Patch Application
Visual guides can significantly enhance understanding and execution, which is why many brands offer instructional videos for applying their leather repair patches. These videos typically feature step-by-step processes, demonstrating the preparation of the damaged area, the application of the adhesive, and the placement of the patch for optimal adhesion.
Following along with a video, users can see exactly how much pressure to apply, how long to hold the patch in place, and any additional steps to ensure a smooth, integrated repair that blends with the original leather. Additionally, troubleshooting tips are often included to address common issues such as air bubbles or misalignment, empowering users to achieve professional-looking results with confidence.
Eco-friendly Attributes of Leather Repair Kits
Opting for leather repair kits not only fixes your favorite items but also contributes positively to the environment. Here’s why:
1. Waste Reduction: Repairing leather extends the life of items, meaning fewer products end up in landfills.
2. Resource Conservation: By mending existing leather, the demand for raw materials used in producing new leather goods decreases.
3. Reduced Pollution: The production of new leather items contributes to air and water pollution; repairs lessen this impact.
4. Non-toxic Options: Many kits are available with eco-friendly, non-toxic adhesives safe for both the user and the environment.
5. Vegan Varieties: For those seeking sustainable options, several brands offer patches made from cruelty-free, synthetic materials that mimic leather’s properties.
By choosing to repair, consumers take an active role in a more sustainable cycle of use and reuse, benefiting the planet while enjoying their cherished leather goods for longer.


