Last updated on
You’ll want to read on because understanding electric scooter repair can empower you to tackle unexpected breakdowns and better decide on the right repair service.
Key takeaways:
- Common electric scooter issues: flat tires, battery problems, brake issues, electrical issues, motor or motherboard failure.
- Tools needed for electric scooter repair: Allen wrenches, screwdrivers, tire levers, multimeter, pliers, wire cutters, torque wrench, air compressor, thread-locking fluid, puncture repair kit, lubricant.
- Step-by-step guide to electric scooter tire replacement.
- Instructions for electric scooter brake repairs.
- Signs that indicate the need for professional electric scooter repair.
Table of Contents
Common Electric Scooter Issues and How to Identify Them
Flat tires are typical due to punctures or wear. Be alert for a rough ride or visible tire damage.
Battery problems may present as reduced range or inability to hold a charge. Check the charge indicator for signs of battery health.
Loose or malfunctioning brakes compromise safety; a squeaking sound or decreased stopping power are tell-tale signs.
For electrical issues such as failing lights or non-responsive displays, investigate wiring and connections first.
If the scooter fails to start, the culprit could be a defective motor or motherboard.
Unusual noises, like grinding or clicking, often signal mechanical wear or a need for lubrication.
Regular inspection and prompt attention to these symptoms can prevent more serious problems.
Tools and Equipment Needed for Electric Scooter Repair
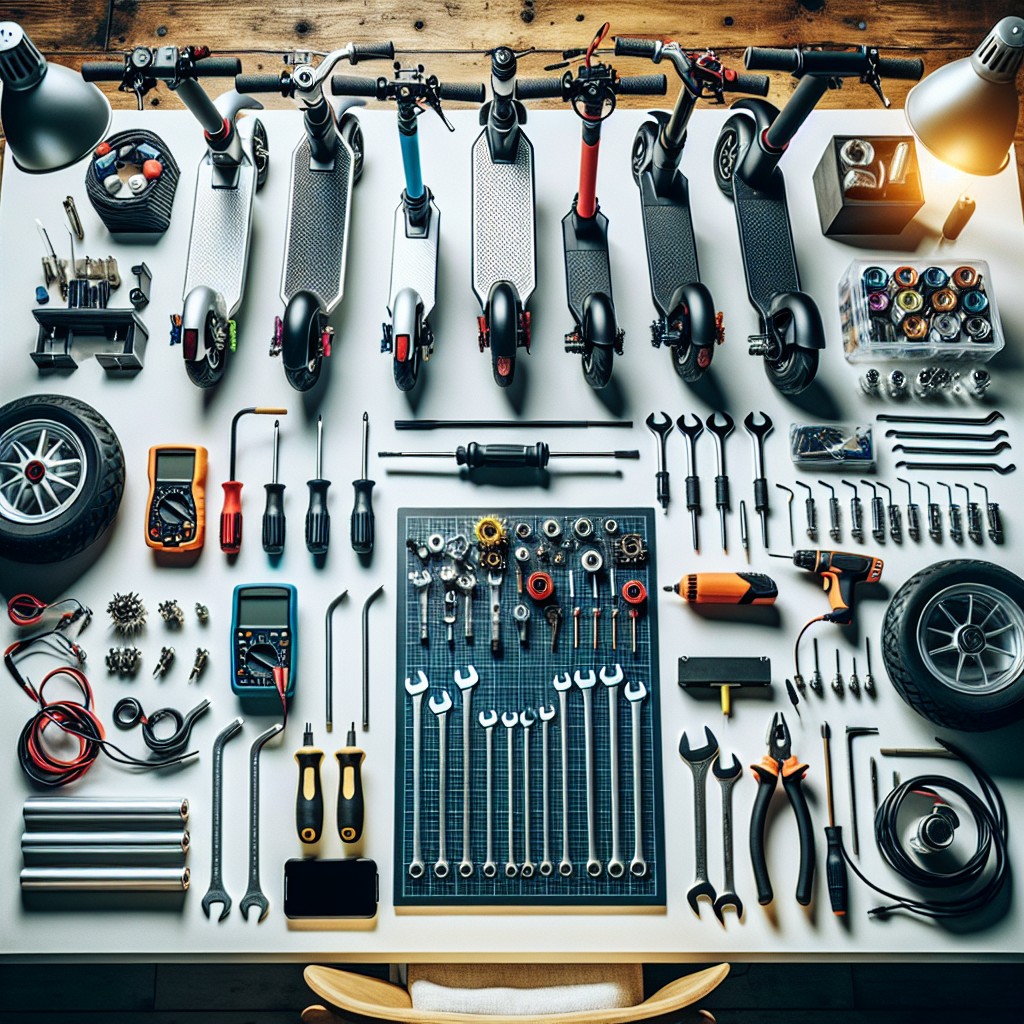
Having the right tools at hand is essential for efficient and safe repairs. Begin with a basic set of Allen wrenches or hex keys, as they are commonly used for assembling and adjusting parts on your scooter. A set of screwdrivers, both flathead and Phillips, will also be necessary for various fasteners.
Additionally, tire levers are crucial for removing and fitting tires on the rim, especially if you’re dealing with a tire replacement or puncture repair. For electrical work, a multimeter is indispensable for diagnosing issues with the battery or other electrical components.
Pliers and wire cutters might come in handy for gripping and cutting materials, while a torque wrench will ensure that all bolts are tightened to the manufacturer’s specifications, preventing over-tightening which could lead to damages.
A portable air compressor or manual pump with a pressure gauge will help you maintain the correct tire pressure, while thread-locking fluid can be used to secure bolts in place after repairs.
Lastly, keep a puncture repair kit in your inventory for quick fixes and a lubricant like WD-40 to deal with any squeaking parts or stiff links. Each tool plays a vital role in the upkeep of your electric scooter, ensuring smooth and uninterrupted rides.
Step-by-Step Guide to Electric Scooter Tire Replacement
Begin by ensuring your electric scooter is turned off and stabilized. Place it on a surface where it won’t roll or shift during the tire replacement process.
Gather the necessary tools, usually a set of allen wrenches or a screwdriver, depending on your scooter model.
Locate the bolts or screws that secure the wheel to the scooter’s frame. These are typically found on the wheel’s hub or axle.
Carefully remove these bolts or screws, and keep them in a secure place to prevent loss.
Gently pull the wheel away from the scooter frame. Some models may have a connecting cable for the motor; disconnect this if necessary.
Remove the damaged tire from the wheel. This may require deflating the tire if it’s not already flat, using tire levers to pry the tire off the wheel rim, or unfastening a retaining screw for solid tires.
Before installing the new tire, check the wheel for any debris or damage that might compromise the new tire’s integrity.
Place the new tire onto the wheel. For pneumatic tires, ensure they are partially inflated to make them easier to fit onto the rim. For solid tires, warming them up can make installation easier.
Once the tire is in position, inflate it to the recommended pressure if it’s a pneumatic tire.
Reattach the wheel to the scooter frame, reconnect any cables, and secure it by replacing the bolts or screws.
Finally, double-check that all connections are tight and that the tire has ample clearance, ensuring it won’t rub against the frame or brakes.
Instructions for Electric Scooter Brake Repairs
Ensuring your electric scooter’s brakes are functioning correctly is crucial for safe riding. For disc brakes, start by inspecting the brake pads for wear; if less than 1 mm of pad is left, it’s time for a replacement. Loosen the hex bolt to slide out the old pads, then insert and secure the new ones.
For drum brakes, the process involves removing the wheel to access the brake assembly. Once inside, clean any debris and check the condition of the brake shoes. Worn-out brake shoes must be replaced by unscrewing the retaining pin, placing the new shoes, and re-securing the pin.
In both types, after installing new brake components, adjust the brake tension. Squeeze the brake lever to gauge responsiveness and tweak until reaching the desired braking power.
Remember: precision is vital, and incorrect repairs can be dangerous. If in doubt or if the problem persists, seek assistance from a professional technician. Regular maintenance is the best way to avoid extensive repairs, so periodically check and adjust your brakes according to the manufacturer’s recommendations.
Fixing Electric Scooter Battery Issues
Diagnosing a battery problem requires attention to symptoms such as reduced range per charge, inability to hold a charge, or power cutting out. Begin by checking the voltage with a voltmeter; a healthy battery should meet the manufacturer’s specified voltage. If the reading is lower, the battery may need charging or replacing.
For charging issues, ensure the charger is functional and the ports are clean. Sometimes, debris or corrosion hinders the connection. If cleaning doesn’t help, try a different charger to rule out a faulty charging unit.
When replacing a scooter battery, first make sure to purchase the right type and size for your model. Disconnect the scooter and remove the battery compartment, usually located underneath the foot panel or seat. Carefully disconnect the old battery, taking note of the wiring configuration, and connect the new one accordingly.
Safety is paramount when handling electric scooter batteries. Always wear protective gloves and eyewear to avoid contact with harmful substances or accidental short circuits. If the process seems daunting or the issue persists, consult a professional to avert the risk of electrical malfunctions or further damage.
When to Seek Professional Electric Scooter Repair Services
Determining when to call in the experts is crucial for ensuring the longevity of your electric scooter. If you’re experiencing persistent electrical problems, such as unresponsive controls or recurring power failures, professional diagnostics are advisable.
Unusual noises during operation or a decrease in performance could be symptoms of a component in need of specialized attention. Also, if the scooter has suffered water damage, it’s best to have a technician assess and remedy any potential issues.
Remember, attempting complex repairs on your own without the necessary expertise can lead to further damage or even void warranties. It’s often more cost-effective and safer to trust a certified repair service with intricate electronic and mechanical concerns.
Signs That Your Electric Scooter May Require a Motherboard Repair
Identifying a malfunctioning motherboard can be pivotal to maintaining the functionality of your electric scooter. Keep an eye out for these warning signs:
- Unresponsive Controls: If the throttle or brake levers do not elicit any reaction from the scooter, it could indicate a communication breakdown with the motherboard.
- Power Failures: Frequent power cuts or the inability to turn the scooter on are often symptoms of motherboard issues.
- Erratic Behavior: Random acceleration, stopping, or beeping sounds may suggest that the motherboard is sending incorrect signals to other components.
- Charging Anomalies: Difficulty in charging the scooter, such as the battery not holding a charge or the charger failing to recognize the scooter, could trace back to motherboard faults.
In these instances, verify that the problems are not due to simpler issues such as loose wiring or battery defects before concluding that a motherboard repair is necessary. If the motherboard is indeed at fault, professional assessment and repair are recommended due to the complexity and delicacy of this component.
Electric Scooter Maintenance: Best Practices
Regular maintenance is crucial to extend the lifespan of your electric scooter and ensure a safe ride. Below are a few best practices to keep in mind:
1. Keep it Clean: Wipe down your scooter after use, paying special attention to the wheels and deck. Dirt and grime can lead to premature wear if not regularly cleaned.
2. Tire Pressure Checks: Just like with bicycles, correct tire pressure is key for optimal performance and safety. Check your tire pressure monthly and inflate as necessary.
3. Battery Care: To maximize battery life, avoid depleting it completely and store your scooter in a cool, dry place. Also, follow the manufacturer’s guidelines for charging intervals.
4. Regular Inspections: Once a month, inspect the scooter for any loose bolts or parts that may require tightening or replacement, and listen for any unusual sounds during operation.
5. Software Updates: If your scooter has a digital interface or app, ensure you install updates. These often include bug fixes and performance improvements.
6. Professional Servicing: Even with diligent maintenance, occasionally book a service with a professional, especially to handle complex systems like brakes and batteries.
By following these practices, you’ll not only enhance your riding experience but also prevent the inconvenience of unexpected repairs.
Understanding Electric Scooter Repair Costs
Factors such as the model of the scooter, severity of the issue, and cost of replacement parts play pivotal roles in determining repair expenses. Simple fixes like flat tires might only require the price of a new inner tube and a nominal service fee, often totaling between $10 and $30. More complex issues, like a malfunctioning motor or a damaged motherboard, however, can lead to higher costs, ranging from $100 to several hundred dollars depending on part quality and labor charges.
Labor costs fluctuate based on the repair shop’s rates and the time taken to complete the repair. Authorized dealers potentially charge more, but they typically offer specialized knowledge and warranties on their services and parts. Battery replacements stand as one of the most expensive repairs due to the high price of lithium-ion cells.
To avoid surprises, request a detailed quote before committing to a repair. Some shops offer a diagnostic service for a small fee to identify issues and estimate repair costs. Maintenance packages can also provide cost-effective solutions to ensure your scooter remains in optimal condition, preventing costly repairs down the line.
It’s worth considering investing in a warranty or insurance plan for your electric scooter which can help in mitigating future repair costs. Understanding these variables will empower you to make informed decisions about managing and anticipating future repair expenses.
How to Choose the Best Electric Scooter Repair Shop
When selecting a repair shop for your electric scooter, consider the following factors:
- Expertise: Look for technicians specifically skilled in electric scooter repairs. They should have a proven track record of diagnosing and fixing a range of scooter issues.
- Reviews: Read customer testimonials and online reviews to gauge the shop’s reputation. High ratings often indicate reliable service.
- Parts Quality: Ensure the shop uses genuine or high-quality aftermarket parts. Inquire if they offer warranties for the replaced components.
- Service Speed: Choose a shop offering prompt repair services. Quick turnaround times mean less downtime for your scooter.
- Cost Transparency: A trustworthy shop will provide clear pricing without hidden fees. They should be willing to give you an estimate before commencing any work.
- Location: Proximity is convenient but don’t sacrifice quality for distance. Sometimes traveling a bit further for a specialist can be worth it.
- Customer Service: Good communication is key. The shop should be willing to explain the repair process and answer any questions you have.
Keep these points in mind, and you’ll be able to make an informed decision, ensuring your electric scooter is in capable hands.


