Last updated on
Here’s a guide on the types of drywall access panels and how to choose the right option before installing. Read on!
When you’re running a commercial business, there will come a time when you need to access building components installed behind walls. Scheduling regular preventative maintenance is critical in keeping your building operational and safe. Most technicians would often ask for convenient access through your walls instead of working through a makeshift hole to reach wires and valves.
Aside from providing an entry point, installing drywall access doors and panels avoids the need for contractors to drill a hole on the wall, which could affect its structural integrity. Not only do they allow access, but manufacturers have significantly improved and personalized each panel depending on the various needs of consumers.
Table of Contents
Types of Drywall Access Panels
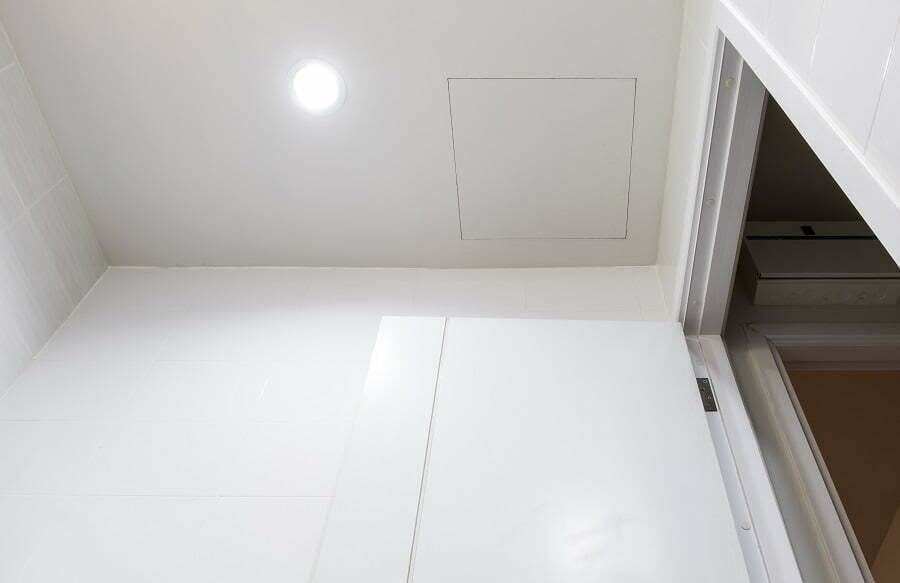
Due to these individual needs, many variations of drywall access doors are available. Identifying your access needs and knowing which product to purchase are the vital steps in choosing the most suitable access door for your wall.
- Fire-rated – Safeguarding building components and valuable assets from harsh elements are paramount in every commercial facility. Many fire-rated wall panels comply with fire standards. Still, to ensure that you choose the suitable unit, it is best to refer to the safety standards set by National Fire Protection Association (NFPA) to determine the most ideal for your location.
- Air and watertight – Being prepared against the devastating nature of floods are especially important for businesses that operate in flood-prone areas and near coastal lines. Having an effective flood prevention plan significantly helps, as well as watertight wall panels to prevent water from penetrating internal building components. Find a product with a fully gasketed door and frame and test for air infiltration and water penetration.
- Removable – The fundamental purpose of access panels is to directly access wires and fixtures behind the wall. If it’s impossible to install a traditional swing door, purchasing a removable panel is the most suitable option.
- Security – Any commercial facility requires protection, but some facilities need an additional level of safety. Some wall panels are built with thicker steel and deadbolt locks to better assist with security in various applications.
- Recessed – If you need to maintain the overall aesthetics of your interior design, the best way to hide unsightly wires and valves inside your wall is by installing recessed drywall panels. These panels can seamlessly blend into its installation surface with its basic white finish. You can apply paint to some recessed units if you need to customize them.
Aside from identifying your access needs, it is also necessary to understand the function of each drywall panel. For instance, watertight access doors are ideal for internal or external applications requiring water tightness. Installing a recessed door in this situation would be completely useless.
Drywall Panel Installation
All drywall access panels are built with factory-grade precision and quality materials. While they are reliable, any exceptional feature is futile when the unit is not installed accurately. Here is an easy guide for installing drywall access doors to ensure that the panel functions as expected.
Step 1: Locate the Fixture
Identifying the exact location of the fixture behind your drywall is crucial to avoid additional work when you mistakenly cut a hole in the wrong area. Listing down the location of each wire or valve before installing the drywall can significantly make the installation process more manageable.
Step 2: Cut a Hole
Once you’ve identified the exact entry point, level the panel’s housing against the wall and trace its outline with a pencil. Carefully saw through the outline using a keyhole or jab saw to ensure precision. If you want to add an extra size, it should be no more than ¼ inch on all sides.
Step 3: Fill the Cracks
Before applying the adhesive, make sure to fill out any cracks in your drywall by sanding, smoothing, or painting over the housing and panel to match the installation surface. This step is critical if you want the drywall panel to blend seamlessly into the wall.
Step 4: Fit the Frame
Hold the housing with a strong adhesive between the flange and the wall’s surface for flush panel installation. Most flush panels are designed to fit in 5/8-inch drywall, but if your wall is thinner, you can remedy this by adding flat shims between the flange and wall.
Step 5: Glue the Frame to Drywall
To ensure that the frame will hold, fill the caulking gun with adhesive and apply a bead of glue under the structure. With the glue in place, firmly press the housing against the drywall and ensure that all sides are equally glued in place. In addition, if you worry about accidentally knocking the frame out of position, you can firmly hold the housing against the wall using spring clamps or secure the edges with tape.
The Takeaway
Once your new drywall panel is in place, you or your technician can now have an easy and safe way of accessing internal components behind the wall. These panels play a significant role during maintenance and repair. With the access door acting as an entry point, you no longer have to worry about paying an additional fee for patching up a hole in your drywall every time.
Whether for industrial or commercial applications, drywall access panel installations offer many benefits during repair sessions and for the entire business. Some units can even improve your LEED score or comply with NFPA standards. Therefore, if you have an upcoming building project or need to gain access to internal components, make sure to include drywall access doors on your priority list.
