Last updated on
Learn how to effectively repair scratches on leather furniture with common household items and specialized leather repair kits.
Key takeaways:
- Assess the damage: Determine scratch depth, leather type, and extent of damage.
- Gather necessary products: Leather cleaner, repair kit, colorant, sandpaper, protector.
- Follow leather repair method: Clean, buff or apply cream, fill with filler, dye, and seal.
- Color match properly: Clean test area, compare against color swatches, use manufacturer’s kit, or create custom color.
- Use the best leather conditioner: Choose suitable product, test it, apply in circular motions, avoid over-conditioning.
Table of Contents
Assess the Damage
Before attempting any repairs, closely inspect the affected area. Take note of the scratch depth; shallow marks will have caused less disturbance of the leather’s surface, while deeper ones might penetrate through the dye and into the hide itself. It’s important to recognize the type of leather as well. For instance, aniline leather is dyed all the way through and scratches can sometimes be buffed out, whereas scratches on pigmented leathers might require colorants for concealment.
Assessing the leather’s color consistency is crucial – variations may affect the appearance post-repair. Lastly, gauge the extent of the damage: a single scratch demands a different approach compared to multiple areas of wear. This initial evaluation will guide you to the appropriate repair method and products.
Products Required
To effectively repair scratches on leather, having the right tools on hand is essential. Start with a high-quality leather cleaner to ensure a clean surface before any repair work. This will remove dirt and oils, allowing repair products to adhere properly.
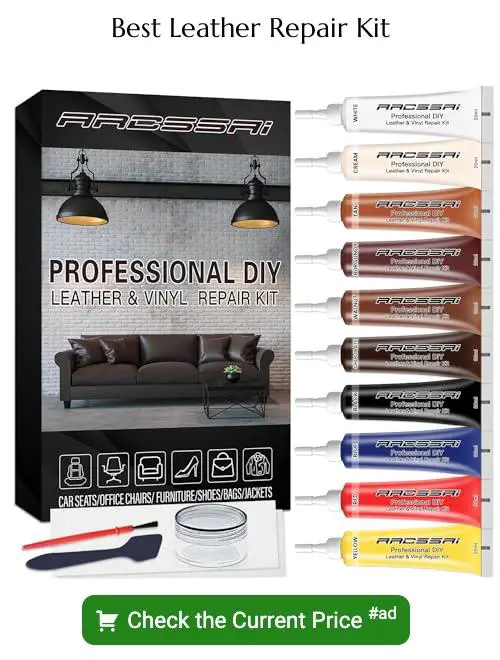
Next, obtain a leather repair kit, which typically includes sub-patch material, spatulas, and various colored repair compounds to fill scratches. Choose a kit that comes with a leather binder for deep scratches, as this will help to reinforce the area affected.
A colorant or dye matched to your leather’s color is crucial for a seamless repair. To apply the colorant, you’ll need a sponge or airbrush, depending on the product instructions. For light scratches, a leather rejuvenating cream may suffice, serving both to camouflage the scratch and provide conditioning.
Additionally, invest in fine-grit sandpaper or a leather sanding pad to smooth the repair area after the filler has been applied and before coloring.
Finishing the repair with a good leather protector will help to seal the colorant or dye and prevent future scratches. Ensure you select a protector appropriate for your leather type. Keep in mind, a test swatch on a hidden section of your leather piece is recommended before applying any product to the scratched area.
Leather Scuff & Leather Scratch Repair Method
Begin by gently cleaning the area with a soft cloth and mild soapy water to remove any dirt and oils. Rinse with a damp cloth and allow to air dry. If the scratches are not deep, you can lightly buff them with a microfiber cloth to smooth out the damage.
For small scuffs, apply a bit of leather cream or balm designed for scratch repair using a soft cloth in circular motions. Allow the cream to be absorbed, then buff off any excess with a clean cloth.
In case of deeper scratches, cautiously fill them with a leather filler, following the instructions for drying time. After the filler dries, gently sand the area with fine-grit sandpaper to ensure an even surface.
To restore the sheen and color, use a leather dye that matches your furniture’s color. Apply the dye in thin layers, allowing ample drying time between coats. Once the dye is set, seal the area with a leather finish product to protect the repair and blend it with the surrounding leather.
Always conduct a patch test in an inconspicuous area before applying products to the entire scratched area to ensure that the color matches and does not cause further damage. Regular maintenance with a leather conditioner can help prevent future scratches and scuffs, maintaining the appearance of your leather furniture.
Color Match Properly
Ensuring a seamless repair involves matching the color of your leather dye to the original hue of the furniture. This is crucial, as an exact match will make the repair virtually invisible.
– Start by cleaning a small, inconspicuous area on your leather to understand the true color, as dirt and oils can alter the appearance.
– Take a picture of the leather in natural light and compare it against color swatches; this helps identify the right dye.
– If available, use the manufacturer’s repair kit tailored for your furniture, as it’s likely to have the matching color.
– For a custom color, mix small amounts of leather dye until you achieve a shade that blends in with the untouched leather when tested on a hidden area.
– Apply the dye with a fine brush or sponge, working it into the scratch; less is more, as you can always add more layers to deepen the color.
Leather Care: What’s the Best Leather Conditioner?
To preserve the integrity and appearance of your leather after repairing scratches, proper maintenance is crucial. A high-quality leather conditioner will replenish the natural oils lost over time, keeping the material supple and preventing further damage.
When selecting a conditioner:
- Opt for a product formulated for your specific type of leather, as different leathers have different care requirements.
- Test the conditioner on an inconspicuous area to ensure it doesn’t alter the color or texture.
- Apply the conditioner with a soft cloth in circular motions, allowing it to penetrate and hydrate the leather.
- Avoid over-conditioning, which can lead to a greasy residue; a thin, even coat is sufficient for most leathers.
Regular conditioning, typically every 3-6 months, can dramatically extend the life of your leather items, ensuring they remain soft and resilient for years to come.


