Last updated on
We’ll cover the steps needed to remove the legs of an old couch in detail, so you can fix them or replace them. Read on!
Have you ever found yourself in a situation where you needed to move a couch, but it just wouldn’t fit through the door? Or maybe you’re redecorating and need to take off the legs to give your couch a new look. Well, let me tell you about my own experience with this exact dilemma.
I remember when I first moved into my apartment, I was so excited about decorating my new space. I had picked out the perfect couch – it was comfortable, stylish, and fit perfectly in my living room. However, disaster struck as soon as I tried to move it into its designated spot.
The couch was too big for the narrow doorway leading into my living room. No matter how much we angled it or tried to force it through, there was no way that thing would fit. I realized that taking off the legs might be our only option.
Now here’s where things got interesting – neither myself nor any of my friends who were helping me move had ever taken apart a couch before. We were all clueless and didn’t even know where to begin! But after some trial and error (and maybe a few YouTube tutorials), we finally figured out how to remove those pesky legs.
If you’re finding yourself in a similar predicament or just want some tips on how to switch up your furniture style by removing your couch’s legs – don’t worry!
In this blog post, I’ll walk you through step-by-step how exactly to take off those legs without damaging your beloved piece of furniture. So let’s get started!
Key takeaways:
- Gather necessary tools: screwdriver, pliers, rubber mallet.
- Clear space around couch to avoid tripping.
- Identify attachment method: screws, bolts, or snaps.
- Unscrew or gently wiggle legs to remove.
- Securely reassemble couch, aligning and tightening screws or bolts.
Table of Contents
My Couch Chronicles

Ah, the Couch Chronicles. It’s a tale as old as time – or at least as old as furniture itself.
As I mentioned in the intro, my own experience with taking off couch legs was quite an adventure. After realizing that we couldn’t fit my new couch through the doorway of my apartment, we knew we had to come up with a solution fast.
We tried everything from pushing and pulling to tilting and twisting – but nothing worked. That’s when one of us suggested removing the legs.
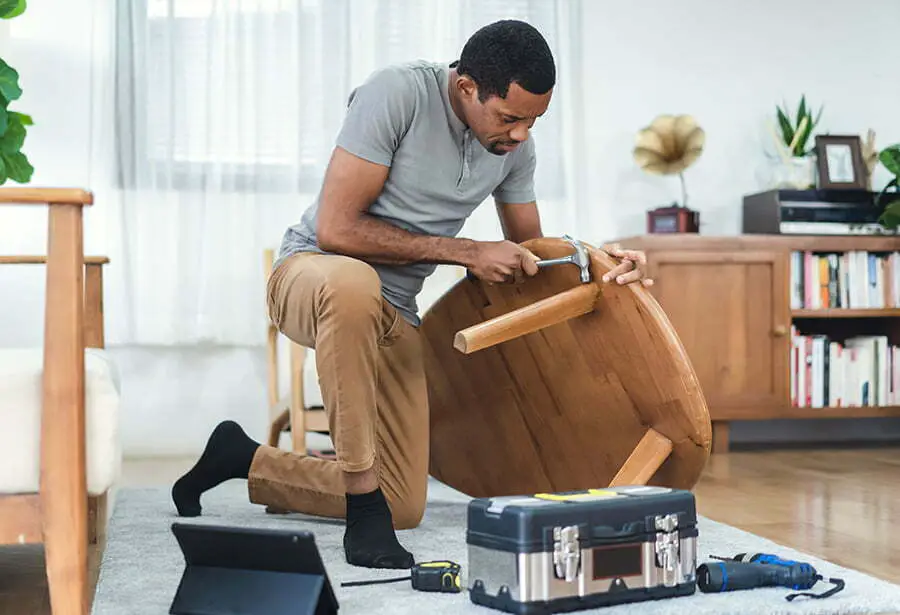
At first, it seemed like an impossible task – how were we supposed to take apart this piece of furniture without damaging it? But after some brainstorming (and maybe a little bit of panic), we decided to give it a shot. We started by flipping over the couch so that its underside was facing upwards.
Then, using pliers and screwdrivers (and some brute force), we began unscrewing each leg from its socket on the bottom of our beloved sofa. It wasn’t easy work; there were moments where I thought for sure something would break or snap off entirely! But eventually, after much sweat and determination (not to mention sore muscles!), all four legs came loose from their sockets one by one until they finally fell away completely.
And just like that – voila! Our once immovable object became mobile again thanks solely to due diligence in figuring out how best to remove those pesky appendages known only too well among homeowners everywhere: The Couch Legs
Prepping for the Leg-venture

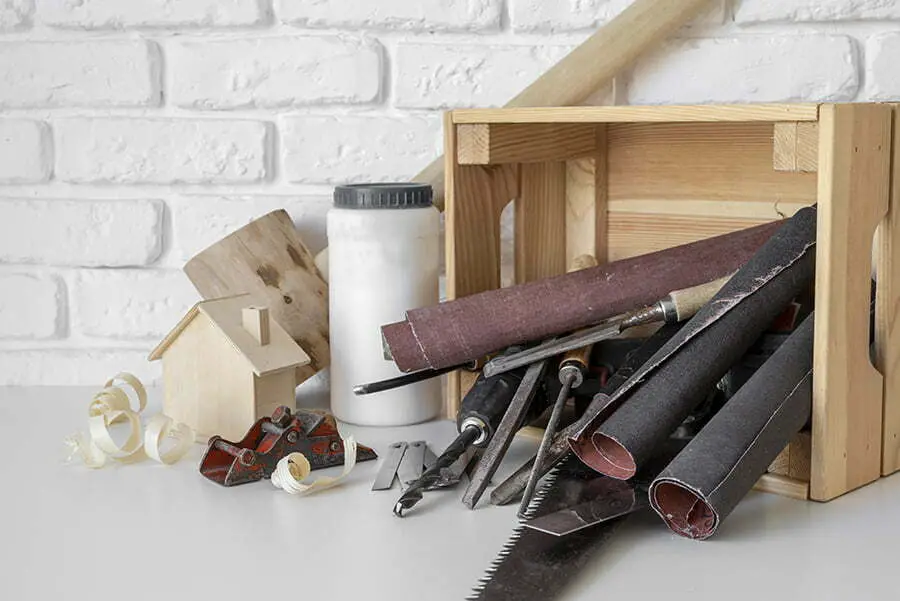
Before we dive into the nitty-gritty of removing your couch’s legs, it’s important to prep for this leg venture. First things first, gather all the necessary tools you’ll need – a screwdriver (either flathead or Phillips), pliers, and possibly a rubber mallet if your couch legs are stubborn.
Next up is safety. Make sure you have cleared out enough space around your couch to avoid tripping over anything while working on it.
Also, be mindful of any sharp edges or corners on the furniture itself that could cause injury.
Now back to my own experience with taking off my couch’s legs – after realizing we needed to remove them in order to fit through our doorway, we quickly gathered some tools and got started. We flipped the sofa onto its back so that we could easily access each leg without straining ourselves too much.
At first glance, it seemed like an easy task – unscrew each leg from its socket, and voila! But as soon as I tried twisting one off myself with a screwdriver alone…I realized how wrong I was!
The screws were tightly screwed in place, making them difficult to loosen by hand alone. That’s when one of my friends suggested using pliers instead; they provided more leverage than just using our fingers, which helped us get those pesky screws out faster than before!
So remember: always come prepared with proper tools and take caution when handling heavy furniture pieces like sofas – especially when flipping them upside down!
Tools of the Trade
Now that you’ve decided to take off the legs of your couch, it’s important to have the right tools on hand. Trust me, I learned this lesson the hard way.
When my friends and I first attempted to remove the legs from my couch, we thought all we needed was a screwdriver. However, after struggling for what felt like hours with no success – we quickly realized that wasn’t going to cut it.
So what are some essential tools you’ll need? First, make sure you have a power drill or screwdriver with different-sized bits. This will allow you to easily unscrew any bolts or screws holding your couch’s legs in place.
Having pliers can be helpful if there are any stubborn bolts or screws that won’t budge. And finally – don’t forget about protective gear! Gloves can help protect your hands while working with sharp edges or metal pieces.
With these tools at hand (and maybe a few extra pairs of helping hands), removing those pesky couch legs should be a breeze!
Identifying Your Couch’s Legs
Now that you’ve decided to take off your couch’s legs, the first step is to identify what type of legs your couch has. This may seem like a no-brainer, but not all couches are created equal! Some have screw-on legs while others have built-in ones that require more effort to remove.
In my case, I had a mid-century modern-style sofa with tapered wooden legs. Screws attached these and were relatively easy to remove once we knew where they were located.
However, if you’re dealing with a different type of leg or aren’t sure how they’re attached – don’t worry! Some general tips and tricks can help you figure it out.
One thing I learned during my own experience was the importance of taking pictures before starting any disassembly process. This helped us keep track of which screws went where and made reassembling the couch much easier later on.
Another tip is to look for any visible hardware or attachments holding the legs in place. Sometimes brackets or plates will be screwed into the bottom frame of your sofa that need removing before you can access the leg itself.
Identifying your couch’s specific leg attachment method is crucial in ensuring a successful removal process without causing damage or unnecessary stress on yourself (or anyone helping). Once we figured out our own situation and got started on removing those pesky wooden pegs from our beloved piece – it was smooth sailing from there!
A Step-by-Step Guide to Detachment
After our initial panic, my friends and I decided to take a closer look at the couch’s legs. We realized that they were attached with screws and bolts, which meant that we could easily remove them with the right tools.
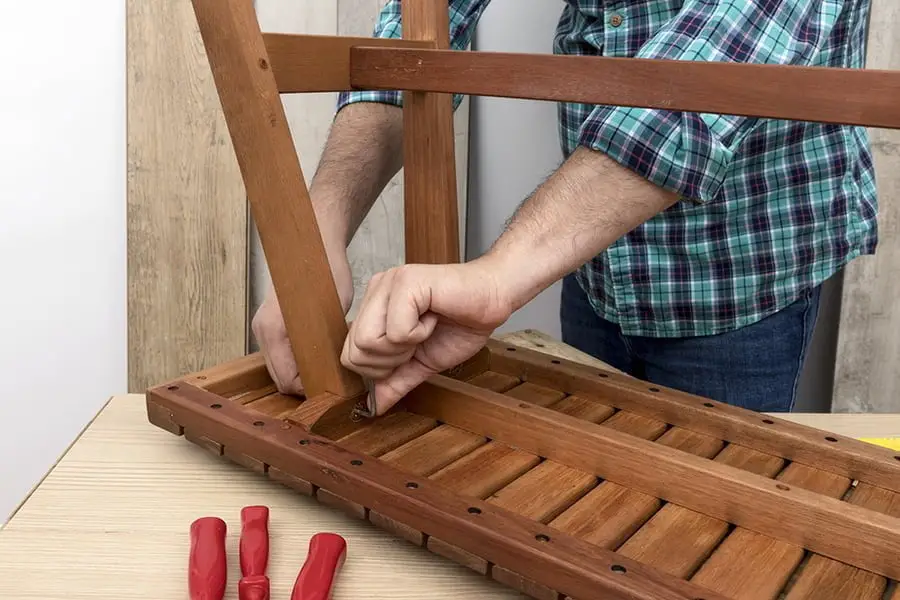
- Step 1: Gather your tools To detach the legs from your couch, you’ll need a few basic tools such as a screwdriver or drill (depending on what type of screws are used), pliers for removing any nuts or bolts holding the leg in place, and possibly an Allen wrench if there are hexagonal-shaped fittings.
- Step 2: Locate attachment points Next up is identifying where exactly each leg attaches to your couch. This can vary depending on how many legs it has – some may have four while others might have six or more! Once you’ve located all of these attachment points (usually found underneath), use your chosen tool to unscrew any fasteners holding them in place.
- Step 3: Remove Legs Once all attachments have been removed successfully using appropriate tools like pliers etc., gently lift one side of the sofa off its remaining supports so that it tilts towards you slightly before pulling outwards until both sides come free from their respective sockets simultaneously!
With these simple steps outlined above, removing those pesky furniture legs should be no problem! Remember not to force anything too hard when detaching parts as this could cause damage beyond repair.
Troubleshooting Tips and Tricks
As I mentioned earlier, taking off a couch’s legs can be tricky if you’ve never done it before. But don’t worry – with some patience and these troubleshooting tips and tricks, you’ll have those legs off in no time.
One thing to keep in mind is that not all couches are created equal. Some may have screws or bolts holding the legs on, while others may snap into place.
Before attempting to remove any part of your furniture, inspect it thoroughly so you know what kind of leg attachment system your couch has.
If your couch has screws or bolts holding the legs on, grab a screwdriver or wrench (depending on which type of fastener is used) and start unscrewing them counterclockwise until they come loose. If they’re particularly stubborn due to rust or wear-and-tear over time, try spraying them with some WD-40 beforehand for easier removal.
On the other hand, if your sofa’s legs snap into place instead of being screwed in directly – gently wiggle each leg back-and-forth while pulling downwards at an angle until it pops out from its socket underneath the frame.
When we were trying to take apart my sofa for moving purposes; we found out that one side was much harder than another because there was something stuck inside one particular hole where one leg had been attached previously! After using pliers carefully around this area without damaging anything else nearby (like fabric), finally managed removing all four feet successfully!
Remember: always use caution when working with furniture pieces as they can be heavy and awkwardly shaped – but by following these tips & tricks along with proper tools like screwdrivers/wrenches/pliers etc., anyone should be able take their favorite piece apart safely without causing damage!
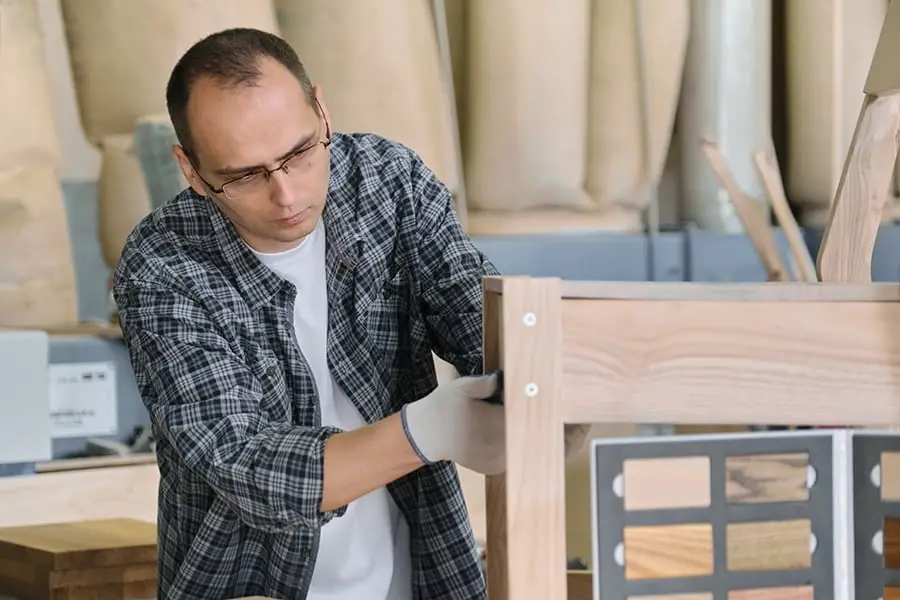
Reassembling: Putting It All Back Together

After successfully removing the legs from my couch, I was left with a pile of cushions and a base that resembled more of an oversized ottoman than a sofa. But fear not. Reassembling your couch is just as easy as taking it apart.
Firstly, ensure you have all the necessary parts before putting everything back together. This includes screws and any other hardware that may have been removed during disassembly.
Next, align the base with the cushions and ensure they are properly aligned before attaching them together using screws or bolts. It’s important to tighten these securely so your couch doesn’t wobble or become unstable once it’s upright.
Once you’ve attached all pieces securely, flip your newly assembled couch over onto its legs (or new ones if you’re replacing them) carefully without damaging any part of it in transit. Finally, give yourself a pat on the back for successfully completing this DIY project!
Taking off those pesky legs might seem like an intimidating task at first but trust me when I say – anyone can do it! With some patience and careful attention to detail during both the disassembly AND reassembly processes. You’ll be able to transform your furniture into something completely different in no time!


