Last updated on
Discover the simple steps to effortlessly install a barn shower door, transforming your bathroom into a stylish and functional space.
Are you looking for a unique and stylish way to upgrade your bathroom? Look no further than a barn shower door! Not only does it add rustic charm, but it also saves space by sliding along the wall instead of swinging open. But don’t worry, installation isn’t as daunting as it may seem.
With a few tools and some patience, you can easily install your own barn shower door. In this article, we’ll walk you through the process step-by-step so you can have a beautiful and functional addition to your bathroom in no time.
Let’s get started!
Key takeaways:
- Barn shower doors add rustic charm and save space.
- Measure and plan space before choosing a door.
- Consider dimensions, style, and special features when selecting a door.
- Gather necessary tools and materials before starting installation.
- Install support bar, attach roller hardware, mount door on track, and install guide rail for stability.
Table of Contents
Barn Shower Door

Before diving into the installation process, it’s important to understand what a barn shower door is and how it differs from traditional shower doors. A barn shower door is a sliding door that hangs on an exposed track system, similar to those found in rustic barns.
This type of door adds character and charm to any bathroom while also saving space by eliminating the need for clearance required by hinged doors.
Barn shower doors come in various styles, including framed or frameless options with different finishes such as brushed nickel or oil-rubbed bronze. They can be made of glass or wood depending on your preference and budget.
Measure and Plan Space

This will ensure that the door fits properly and functions correctly.
First, measure the width of your shower opening at three different points: top, middle, and bottom. Use the smallest measurement as your guide for selecting a barn door kit that fits within those dimensions.
Next, consider how much clearance is needed for sliding doors on either side of the opening when they are fully open. Make sure there is enough room so that people can easily enter or exit without feeling cramped.
Decide which direction you want your barn shower door to slide – left or right – based on what works best with other fixtures in your bathroom such as sinks or toilets.
Choose the Right Door
First and foremost, you’ll want to make sure that the door fits your bathroom’s dimensions. Measure the width of your shower opening and choose a door that is slightly wider than this measurement so it can overlap on both sides.
Next, think about what style of barn shower door will best suit your bathroom decor. There are many options available including traditional wood doors or modern glass ones with metal frames.
Consider also whether you want a single or double sliding barn shower door. A single sliding option may be more suitable for smaller bathrooms while double doors work well in larger spaces.
Take into account any special features such as frosted glass for privacy or easy-to-clean materials like tempered glass.
Gather Tools & Materials

Here is a list of what you’ll need:.
Tools:
- Drill
- Screwdriver
- Level
- Measuring tape
- Pencil
Materials:
- Barn shower door kit (includes track, rollers, hardware)
- Support bar/header (if not included in kit)
- Screws & anchors
- Guide rail (optional)
Before starting the installation process, make sure all of these items are readily available. Having everything on hand will save time and prevent frustration during the installation process.
Install Support Bar/Header
This will provide stability and ensure that your door stays securely in place. To do this, measure the width of your shower opening and cut a piece of wood to fit.
Then, use screws to attach it above the opening.
Make sure that it is level before securing it in place as any misalignment can cause issues when mounting the roller hardware later on.
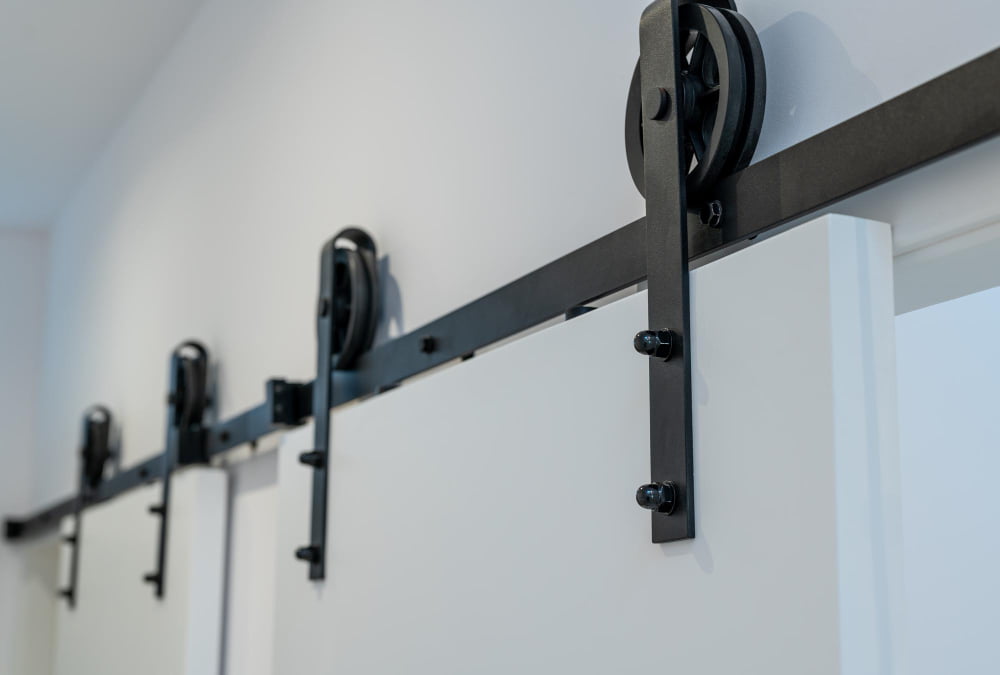
Attach Roller Hardware
This is a crucial step in ensuring your barn shower door functions properly.
First, measure and mark where you want to place the rollers on both sides of your door. Make sure they are level with each other before drilling pilot holes for screws.
Next, attach the rollers onto each side of your barn shower door using screws provided in your kit or ones recommended by manufacturer instructions.
Once attached securely, slide them onto the track starting from one end until they reach their final position at either end of it.
Make sure that both rollers are aligned correctly so that there is no wobbling when opening or closing doors. If necessary adjust them accordingly until everything runs smoothly without any hiccups!
Mount Door On Track
This step requires some patience and precision, but with a little effort, you’ll be able to slide your new shower door open and closed with ease.
Firstly, lift up one side of the barn shower door and place it onto one end of the track. Then carefully lower that side down so that both rollers are resting on top of the track.
Repeat this process for other side as well.
Next, gently push or pull each roller until they are aligned properly in their respective tracks. Make sure there is no wobbling or tilting when sliding back-and-forth along its path.
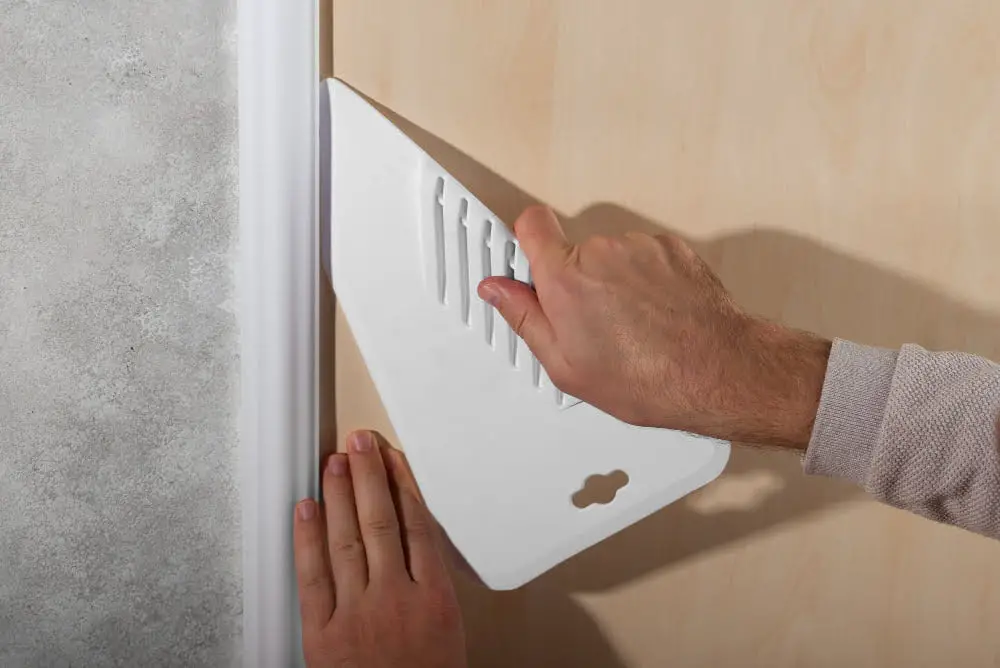
Install Guide Rail
The guide rail helps keep your barn shower door in place and prevents it from swinging out of alignment.
To install the guide rail, first measure and mark where you want it to be placed on your wall. Then use a level to ensure that it is straight before drilling pilot holes into both ends of the rail.
Next, attach one end of the guide rail using screws or bolts provided with your hardware kit. Make sure that this end is securely fastened before attaching and securing other side.
Test out your new barn shower door by sliding it back and forth along its track while checking for any misalignment or wobbling motion caused by an improperly installed support bar/header or roller hardware.
Seal Edges (Optional)
While this step is optional, it can help keep your bathroom floor dry and prevent any potential damage.
To seal the edges of your barn shower door, you will need a clear silicone caulk and a caulking gun. Start by cleaning the area around where you want to apply caulk with soap and water or rubbing alcohol.
Then load up your caulking gun with silicone caulk and carefully apply a thin bead along all exposed edges of both sides of the track.
Smooth out any excess caulk using either a finger or damp cloth before allowing it to dry completely for at least 24 hours before using your new barn shower door again.
Final Adjustments

This step is crucial to ensure that your door operates smoothly and efficiently. Start by testing the movement of the door along its track.
If it feels too tight or loose, adjust the roller hardware until you achieve a smooth glide.
Next, check that your guide rail is properly aligned with the rollers on top of your barn shower door. Adjust as necessary to prevent any wobbling or misalignment.
Take a moment to inspect all edges and corners for any gaps where water could potentially leak through during use. If needed, apply silicone sealant around these areas to create a watertight seal.
With these final adjustments complete, stand back and admire your new barn shower door! Not only does it add style and character to your bathroom but also provides practical functionality in saving space while adding privacy when needed – making every morning routine feel like an indulgent spa experience!.


