Last updated on
Explore the compelling world of design memory crafts because their transformative power can alter and enliven your living spaces in unimaginable ways.
Embarking on a creative journey requires the right toolkit, whether you’re manifesting your future with a vision board or preserving cherished memories through scrapbooking. In this article, you’ll explore the critical elements to bring your Design Memory Craft projects to life, from the basics of assembling an inspiring vision board kit to the essential tools every paper crafter should have on hand.
Dive in for insightful tips on selecting images that embody your aspirations, employing techniques that ensure your scrapbook withstands the test of time, and discover the multitude of ways your craft can fuel motivation and offer therapeutic benefits.
Here, you’ll find everything needed to craft a meaningful and enduring artistic expression.
Key takeaways:
- Vision Board Kit Essentials: Choose a sturdy base, gather magazines and quotes, and use colored markers and adhesive.
- Crafting the Vision Board: Select images that reflect your goals, arrange them aesthetically, and allow for future additions.
- Benefits of a Design Memory Craft Vision Board: It serves as a visual and tactile representation of goals and aspirations, stimulates motivation, and acts as a therapeutic activity.
- Techniques for Preserving Memories Through Scrapbooking: Use archival-quality materials, incorporate journaling and protective layers, and consider digital elements.
- Must-Have Tools for Every Paper Crafter: Include a paper trimmer, detail scissors, bone folder, embossing tools, punches, cutting mat, clear acrylic blocks, tape, glue pen, scoring board, and ruler.
Table of Contents
Vision Board Kit Essentials
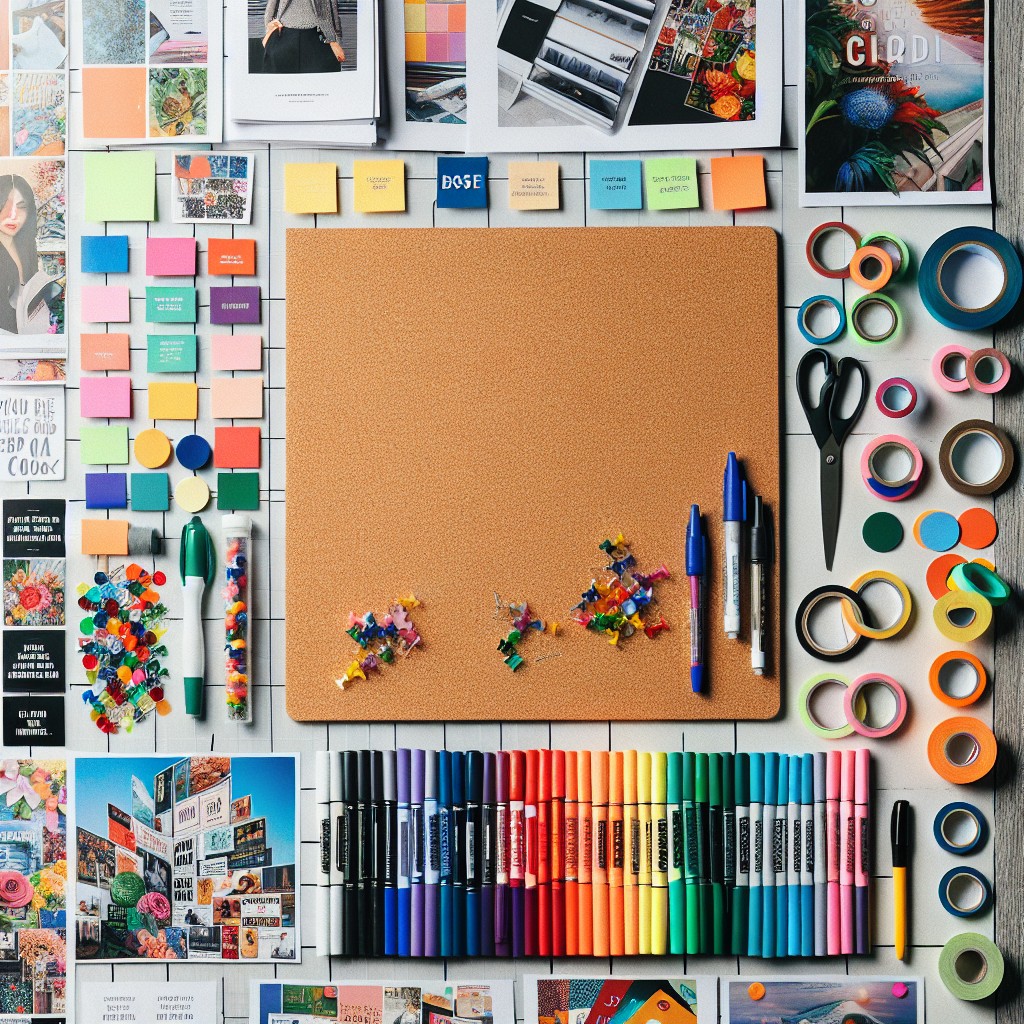
Creating a vision board is an inspirational journey, and having the right tools at your disposal ensures a smooth creative process. Begin with a sturdy base such as a corkboard, foam board, or canvas—this will be the foundation for your dreams and goals.
Next, gather a selection of magazines, photographs, and printed quotes that resonate with your aspirations.
Colored markers, pens, and pencils are indispensable for adding personal touches and annotations. Don’t forget a pair of sharp scissors for precise cutting, and consider a set of craft knives for more intricate designs. Adhesive is crucial; stock up on double-sided tape, glue sticks, or push pins for a temporary hold, allowing you to rearrange items as your vision evolves.
To enhance your board’s visual impact, include embellishments such as stickers, washi tape, and decorative papers. If you desire depth and texture, fabric scraps and buttons can add a tactile dimension. Lastly, allocate space to periodically add new inspiration, reaffirming commitment to your goals as they develop over time.
These essentials form the backbone of a powerful vision board, a beacon to chart the course for your future ambitions.
Crafting the Vision Board

When selecting images for your vision board, focus on those that reflect your goals and aspirations. Consider magazines cutouts, printed quotes, or personal photographs that truly resonate with your ambitions.
Positioning these elements is next: arrange them in a way that feels aesthetically pleasing to you, but also keeps your objectives in clear view. Include space for future additions, as your goals may evolve.
Lasty, remember that this is a living project – one that can grow and change over time, just like your dreams and goals.
Benefits of a Design Memory Craft Vision Board
A Design Memory Craft Vision Board serves as a visual and tactile representation of personal goals, aspirations, and cherished memories. It not only immortalizes your creative expressions but also acts as a constant source of inspiration.
By assembling images, quotes, and symbols that resonate with your aspirations, you stimulate your visual senses and reinforce your daily motivation. The process of creating the board can also be a therapeutic activity, allowing for introspection and self-discovery.
Additionally, such a board becomes a unique piece of art in your living space, reflecting your individuality and evolving journey. With every glance, you’re reminded of what’s important, keeping you aligned with your life’s purpose and driving focus towards achieving your dreams.
How to Incorporate Various Textures and Layers
Incorporate textures by layering different materials such as lace, burlap, or textured paper. To achieve visual depth, apply techniques like distressing edges or using foam dots for a raised effect. Bring in natural elements like dried flowers or leaves, ensuring they’re properly preserved to prevent decay. Layers can be added through the use of die-cuts, paper frames, or pockets that can hold mementos.
Experiment with fabric scraps for a tactile feel; adhere them with a strong, fabric-friendly glue. For shine and dimension, employ the use of sequins, beads, or metallic foils. However, be mindful of the weight and thickness of materials—excess bulk might stress your project’s base.
Don’t shy away from using paints or inks to create a background with depth or to highlight edges. Blending colors and hues also contributes to a multifaceted look. Tools like embossing folders or heat guns can help to add texture without the bulk.
Remember, balance is key. While it’s tempting to add numerous layers, consider how they contribute to your overall design and ensure they complement rather than overwhelm. To maintain the integrity of your craft, make sure each layer is secured and has a purpose in the storytelling of your piece.
Choosing the Right Adhesives for Your Memory Crafts
Selecting the appropriate adhesive is crucial for ensuring the longevity and aesthetic appeal of your memory crafts. Here’s a breakdown to help you make the best choice:
- Paper to Paper: Use glue sticks or roller adhesives for a clean, wrinkle-free bond.
- Adding Embellishments: Double-sided tape or clear-drying craft glue is suitable for sequins, beads, or buttons.
- Fabric Attachments: Opt for fabric glue that dries clear and flexible to avoid stiff patches.
- Heavy or 3D Objects: Consider hot glue or epoxy resins for a strong hold that can support more weight.
- Photo-Safe Options: Always ensure the adhesive is acid-free to prevent damage to photographs over time.
- Repositionable vs. Permanent: Decide whether you want the flexibility to move pieces around or a firm, lasting stick.
- Quick Drying: For rapid projects, quick-set adhesives can speed up crafting without the wait.
Remember to test adhesives on scrap material to ensure compatibility and achieve the best results for your project.
Techniques for Preserving Memories Through Scrapbooking
One meaningful way to safeguard your cherished moments is by employing archival-quality materials. Opt for acid-free papers and photo-safe adhesives to prevent yellowing and deterioration over time. Additionally, incorporating journaling alongside your photos adds context and personal narratives that future generations will appreciate.
Consider photo sleeves or laminates as protective layers against fingerprints and environmental damage. They offer an added layer of security for your snapshots without compromising the aesthetics of your pages.
For an interactive element, use page protectors with pockets. These allow you to store additional mementos like tickets or cards, which can be viewed and enjoyed without exposing them to potential damage.
Digital elements can also play a role in preserving memories. Print digital photos using high-quality printers and inks, and consider incorporating QR codes that link to video or audio clips for a multimedia scrapbooking experience.
Embrace the use of labeling systems to document the who, what, when, and where of your memories. Neatly written or typed labels ensure that details aren’t forgotten and make it easier for others to follow the storyline of your scrapbook.
Lastly, the organization is key. Store your scrapbooks in a cool, dry place out of direct sunlight to maintain their condition. Dust covers or storage boxes can further shield your creations from the ravages of time.
Must-Have Tools for Every Paper Crafter
A well-stocked toolkit is crucial for paper crafting success. Begin with a quality paper trimmer for clean, straight cuts. Precision is key, so include a set of detail scissors with fine tips for intricate patterns.
Bone folders help in creating crisp folds without damaging the fibers of your paper.
To add dimension, embossing tools enable you to raise patterns on cardstock. A reliable set of various-shaped punches allows for quick embellishment creation. Don’t overlook the importance of a good cutting mat, protecting surfaces and ensuring clean cuts.
For those working with stamps, clear acrylic blocks are indispensable for accurate placement.
For adhering your elements, double-sided tape and a glue pen are essentials for strong bonds and dotting delicate pieces. Lastly, consider a scoring board for effortless, repeatable folds and a ruler for precise measurements which are foundations of any successful paper crafting project.
Inspiration Sources for Memory Crafts
Drawing from life’s milestones, such as weddings, births, and anniversaries, transforms memories into tangible keepsakes. Explore nature for organic textures and colorful palettes, incorporating elements of the outdoors into your projects.
Family heirlooms or vintage finds add a touch of history and storytelling to your craft. Use photography not just for the images but also for the emotions and stories they convey. Music can also be a powerful muse; concert tickets and playlists ignite memories of melodies and moments.
Literature, poetry, and quotes provide thoughtful narratives that enhance the emotive quality of your craft. Lastly, art supplies themselves can inspire; play with new materials and let their properties guide your creation.
Incorporating Mixed Media Elements
Dive into the transformative world of mixed media to add depth and intrigue to your memory crafts. This approach allows for a symphony of contrasting materials, creating rich, tactile experiences.
First, experiment with textiles. A swatch of fabric or a piece of lace acts as a canvas for other elements, giving your project a soft, homespun feel.
Next, consider ephemera such as old book pages, ticket stubs, or handwritten notes. These items add a historical touch and tell a unique story.
Layering is key; combine different textures like paper atop burlap or metal elements over cardboard. This contrast not only catches the eye but also invites touch.
Incorporate three-dimensional objects to make your craft pop literally. Small charms, beads, or buttons can create focal points and add whimsy.
Use paint to unify disparate elements. Watercolors offer a translucent wash of color, while acrylics provide bold, opaque coverage. Lightly brushing over the tops of raised textures accentuates their features.
Incorporate ink and mists to achieve color gradients, splatters, and spritzes that bring an air of spontaneity.
Finally, remember the power of the unexpected. A pop of neon amidst pastels or a sleek metal component within a rustic setting brings exciting surprises to your creations.
Utilizing Stamps and Stencils for Personalization
Personalizing your memory crafts with stamps and stencils adds a unique touch that reflects your style and captures memories vividly. Here are some tips for integrating these tools effectively:
1. Select stamps that resonate with personal interests or the theme of your project. From vintage designs to contemporary shapes, the right stamp can make a page pop.
2. Use stencils to create backgrounds or layered effects, experimenting with different inks or paints for variety.
3. Mix and match stamps and stencils to build depth; a stamped image overlaid with stencil work creates a dynamic texture.
4. Remember that less is often more: a strategically placed stamp or stencil can speak volumes without overwhelming your design.
5. Consider making your own stencils for a truly one-of-a-kind design feature – trace desired shapes on plastic sheets and cut them out for repeated use.
6. Clean stamps and stencils immediately after use to ensure crisp lines and shapes for future projects.
By thoughtfully incorporating these elements, you’ll imbue your craft with personality and meaning that resonates with viewers and preserves memories in a special way.
Upcycling Ideas for Memory Keeping
Revitalize preloved items by incorporating them into your memory projects, transforming the mundane into captivating keepsakes. Old book pages can be repurposed as textured backgrounds or used to make envelopes for storing mementos.
Outdated maps offer an adventurous backdrop for travel-themed scrapbooks. Used fabric scraps, such as denim or lace, add a tactile element to layouts, honoring the materials’ histories.
Consider the charm of vintage postcards and photographs; they can be layered with modern embellishments to create a rich chronological narrative. Empty product containers, like perfume bottles or decorative boxes, can be altered to house small trinkets and photos.
Experiment with household items like bottle caps and cardboard rolls for making unique stamps and stencils. Old greeting cards deserve a second life, not simply as pages in your scrapbook but as die-cut shapes or tags for journaling.
In this eco-conscious approach, every item holds potential – a coffee-stained paper doily might be the final touch your page needed. Remember, by upcycling, you’re not only crafting a memory keeper but also embracing sustainability.
Participating in Blog Hops to Engage With the Crafting Community
Blog hops offer unique opportunities for crafters to connect, showcase their work, and discover new sources of inspiration. When you participate in one, you’re providing a virtual ‘hop’ from your blog to another, creating a chain of craft enthusiasts sharing their projects.
Here’s how you can make the most of these events:
- Engage genuinely: Comment on other participants’ projects. This can lead to meaningful interactions and potential collaborations.
- Share strategically: Post your best work to represent your skills and catch the attention of fellow creators and followers.
- Use social media: Promote the blog hop on your social channels to extend its reach and invite more engagement.
- Follow the guidelines: Respect the themes and submission rules set by the blog hop organizer to ensure a cohesive experience for participants and visitors.
- Network: Use this as an opportunity to network with other bloggers and brands that might be participating or sponsoring the event.
- Be consistent: Regular participation in blog hops can help establish your presence in the crafting community.
Remember, a blog hop is not just about promoting your own work; it’s about building a supportive network that benefits all participants through shared passion and creativity.
Collaboration Opportunities With Brands Like Xyron & Faber-Castell
Collaborating with industry-leading brands can significantly enhance your design memory craft projects. Working with companies like Xyron and Faber-Castell presents an opportunity to access a broad range of high-quality materials and tools. Consider these points to maximize such collaborations:
1. Product Trials: Engage in collaborations that offer the chance to try new products before buying. This could involve testing adhesives from Xyron or experimenting with Faber-Castell’s latest range of artist-grade pencils.
2. Sponsored Projects: Look for partnerships where brands sponsor specific crafts. This sponsorship may include monetary support or supply of materials, allowing you to showcase innovative uses for their products.
3. Guest Blogging: Offer to create content for the brands’ blogs. This provides exposure to their audience and establishes your expertise in the field.
4. Giveaways and Contests: Host giveaways or contests in collaboration with these brands. It can drive traffic to your blog and encourage interaction with your content and the brands’ products.
5. Workshops and Webinars: Brands may collaborate with you to host online or in-person workshops using their products, thus providing an educational value to your audience.
Remember to keep the collaborations authentic and relevant to your niche to maintain credibility and provide genuine value to your readers.
Navigating Design Memory Craft Blog Categories
Efficient navigation through blog categories maximizes the value of your visit to the Design Memory Craft blog. Here’s how to make the most of it:
– Project Type: Grouped by projects like greeting cards, scrapbook pages, or mixed media, this category helps you find tutorials and inspiration specific to your craft interest. – Product-Specific Tips: If you have Gelatos, PITT artist pens, or Textural Accents, there’s a dedicated section brimming with tips and techniques for each product line. – Skill Level: Whether you’re a beginner or a seasoned crafter, categories are marked to guide you to content that matches your comfort level. – Seasonal Projects: Look out for categories that change with the seasons, offering timely crafts for holidays or special occasions. – Crafting Techniques: Expand your repertoire by exploring categories focused on specific techniques like embossing, die-cutting, or layering.By using these categories, you hone in on content that caters to your current interests or skill-building goals. Happy crafting!
How to Connect With Fellow Crafters Online
Building a network with like-minded crafters can enhance your creative journey and provide a supportive community for sharing ideas and inspiration. Here are some effective ways to connect online:
Social Media Groups: Platforms like Facebook and Instagram have groups dedicated to crafting. Join these communities and be active—participate in challenges, share your projects, and offer advice.
Online Forums: Sites like Reddit and Craftster host forums where you can ask questions, get feedback, and join swaps or collaborative projects.
Crafting Blogs: Engage with bloggers by leaving thoughtful comments on their posts; this can lead to meaningful exchanges and even guest posting opportunities.
Virtual Workshops: Attending online classes or webinars is a great way to meet others interested in similar techniques or projects.
Hashtags: Use and follow relevant hashtags on social media to discover new crafters and join conversations.
Craft-Alongs: Participate in scheduled craft-alongs, which are online events where individuals work on the same project simultaneously and share results.
Remember, a simple interaction can blossom into a fruitful connection, so don’t hesitate to reach out and engage with your fellow crafters.
Managing and Responding to Blog Comments and Trackbacks
Engaging with your blog’s audience is crucial for community building and providing a dynamic platform for your readers. When handling comments:
- Stay on top of new comments by setting up email notifications, which ensures timely responses.
- Acknowledge every comment by either liking it or replying; this makes your readers feel heard and valued.
- Maintain a respectful and professional demeanor, even when addressing negative feedback.
- Foster discussions by asking open-ended questions in your responses, which can lead to more meaningful interactions.
Trackbacks are a bit different:
- Regularly review trackbacks to ensure they come from reputable sources; this protects your blog from associating with undesirable content.
- Consider approving trackbacks that add value to your content, as they can introduce your readers to beneficial complementary resources.
- If your blog software allows it, set up moderation for trackbacks just as you would for comments to keep control of what gets displayed on your site.